

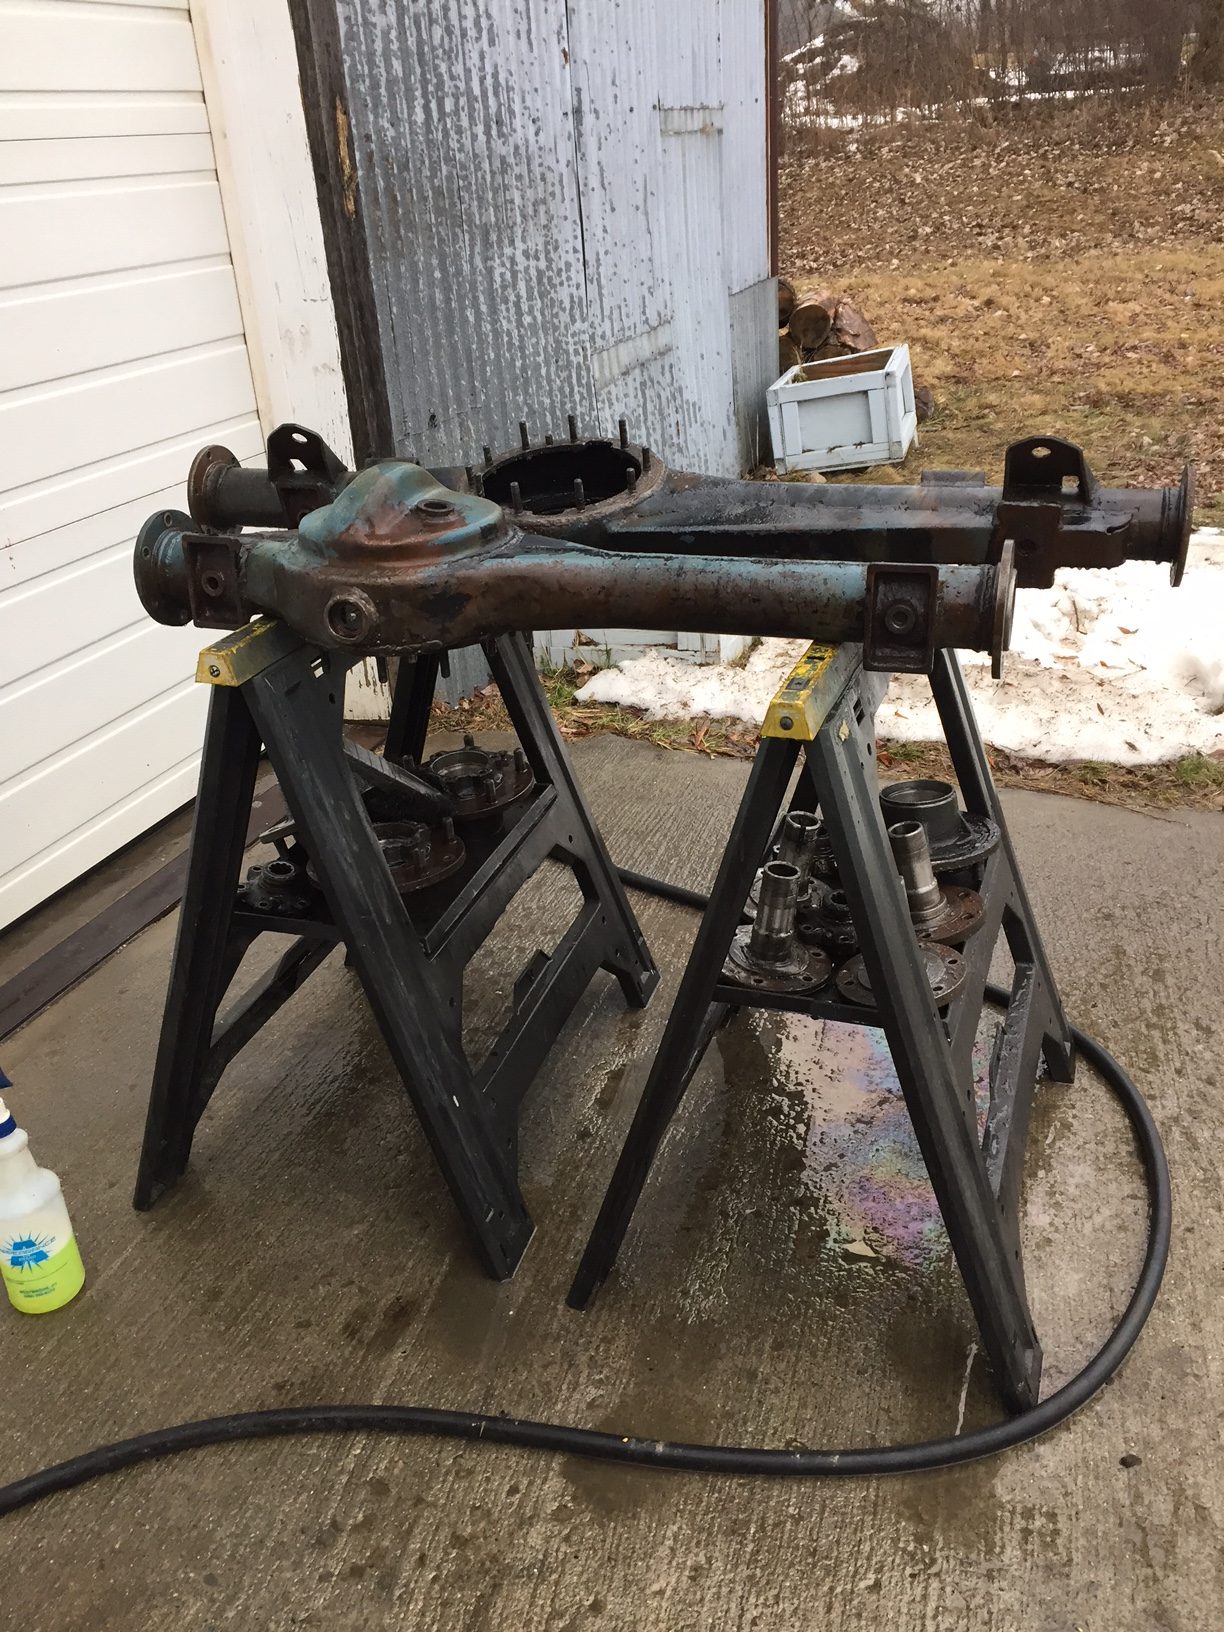
This is a dirty, tedious job………cleaning, wire brushing, and assessing axle tubes.

Axles parts fresh out of the parts washer…….and there’s the ubiquitous blue paint…….even a steam cleaning can’t get rid of it!
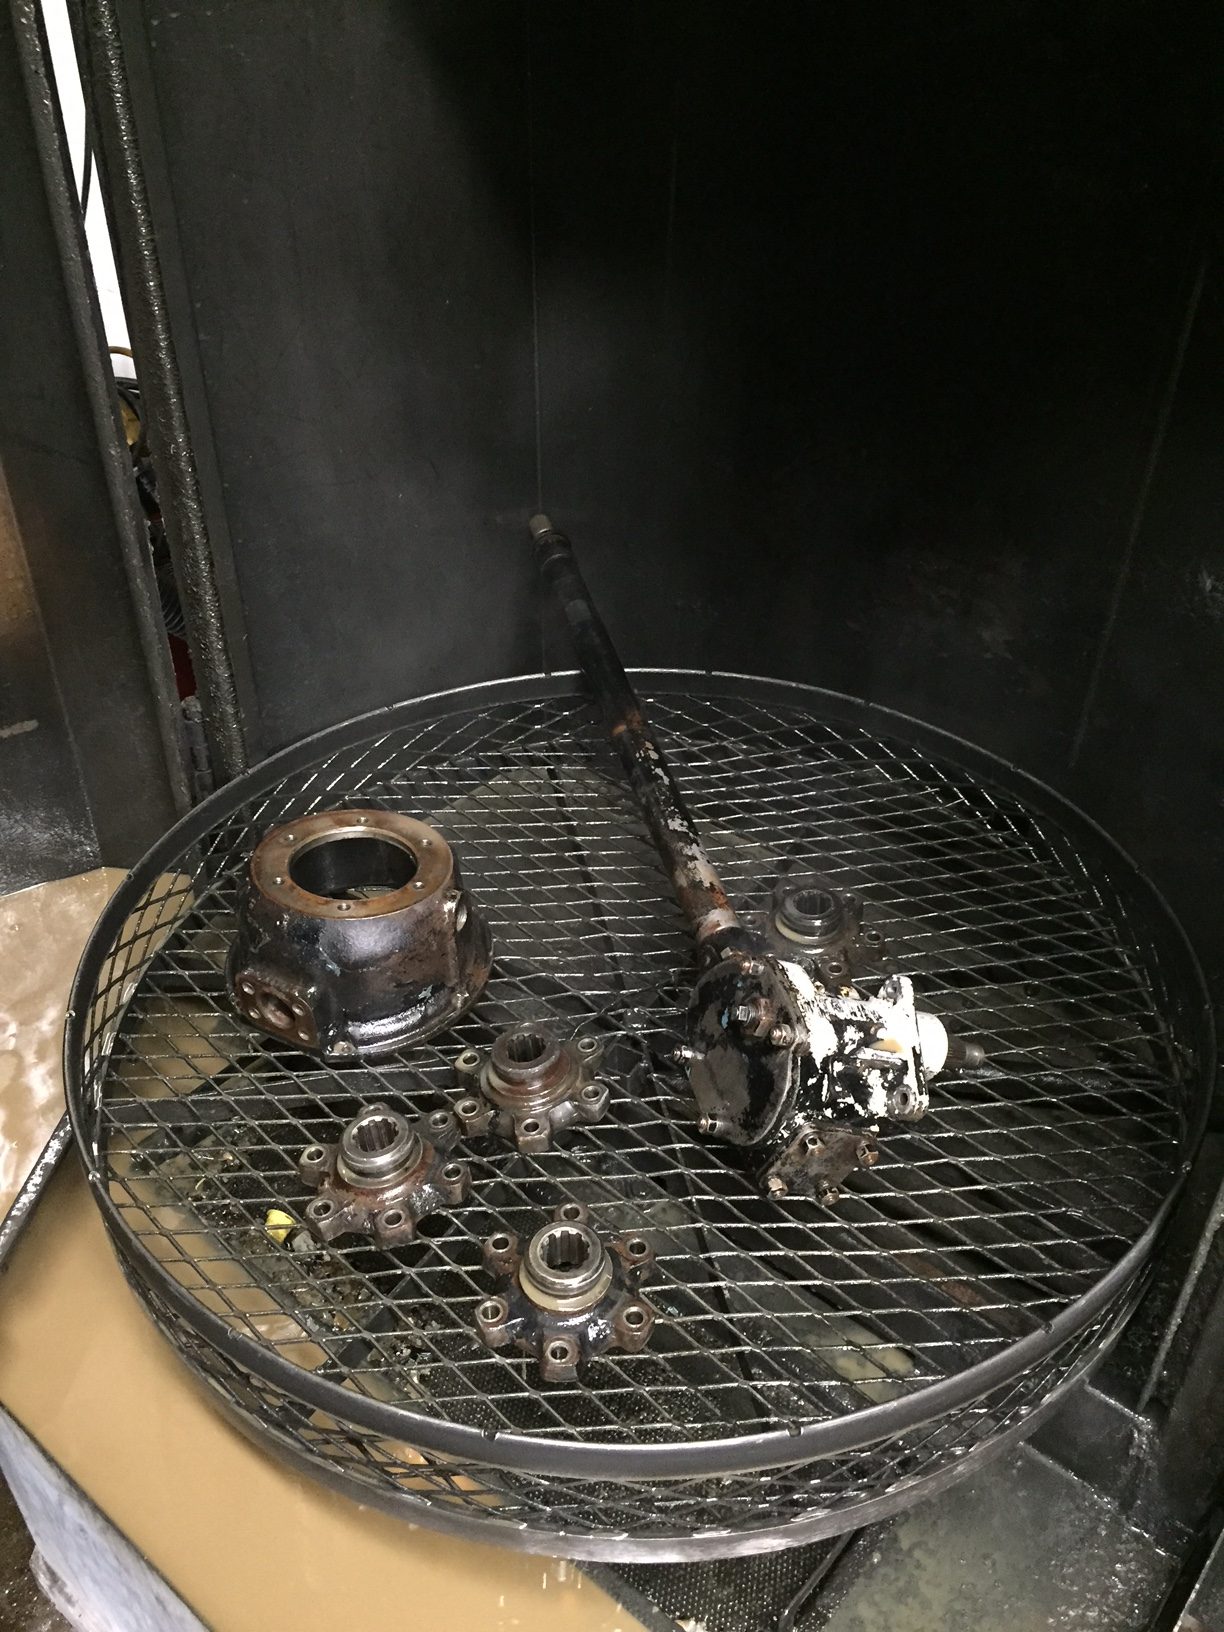
Fresh and clean in the parts washer , but still a long way to go from here.
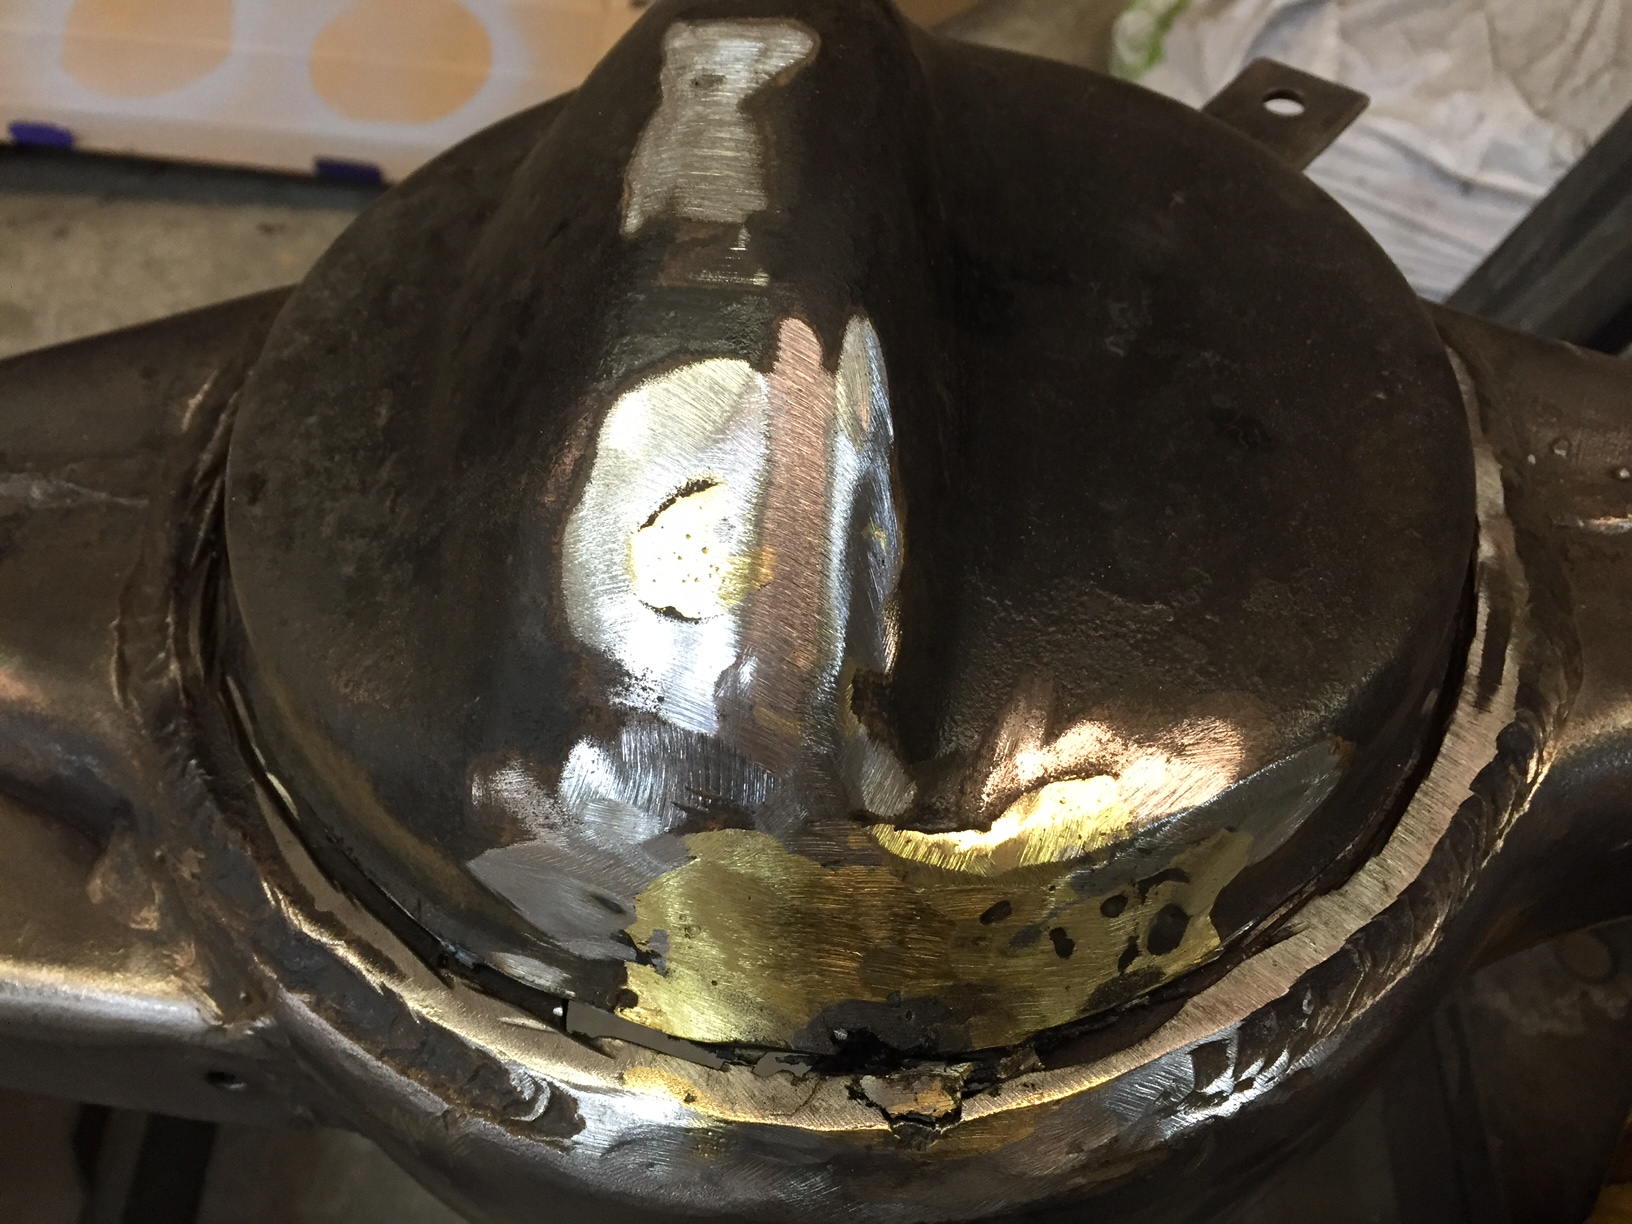
An example of a poor previous repair. Lots of brazing rod was used here to repair a hole…….not salvageable in my opinion so I’ll cut the whole cover off and weld on a new one.
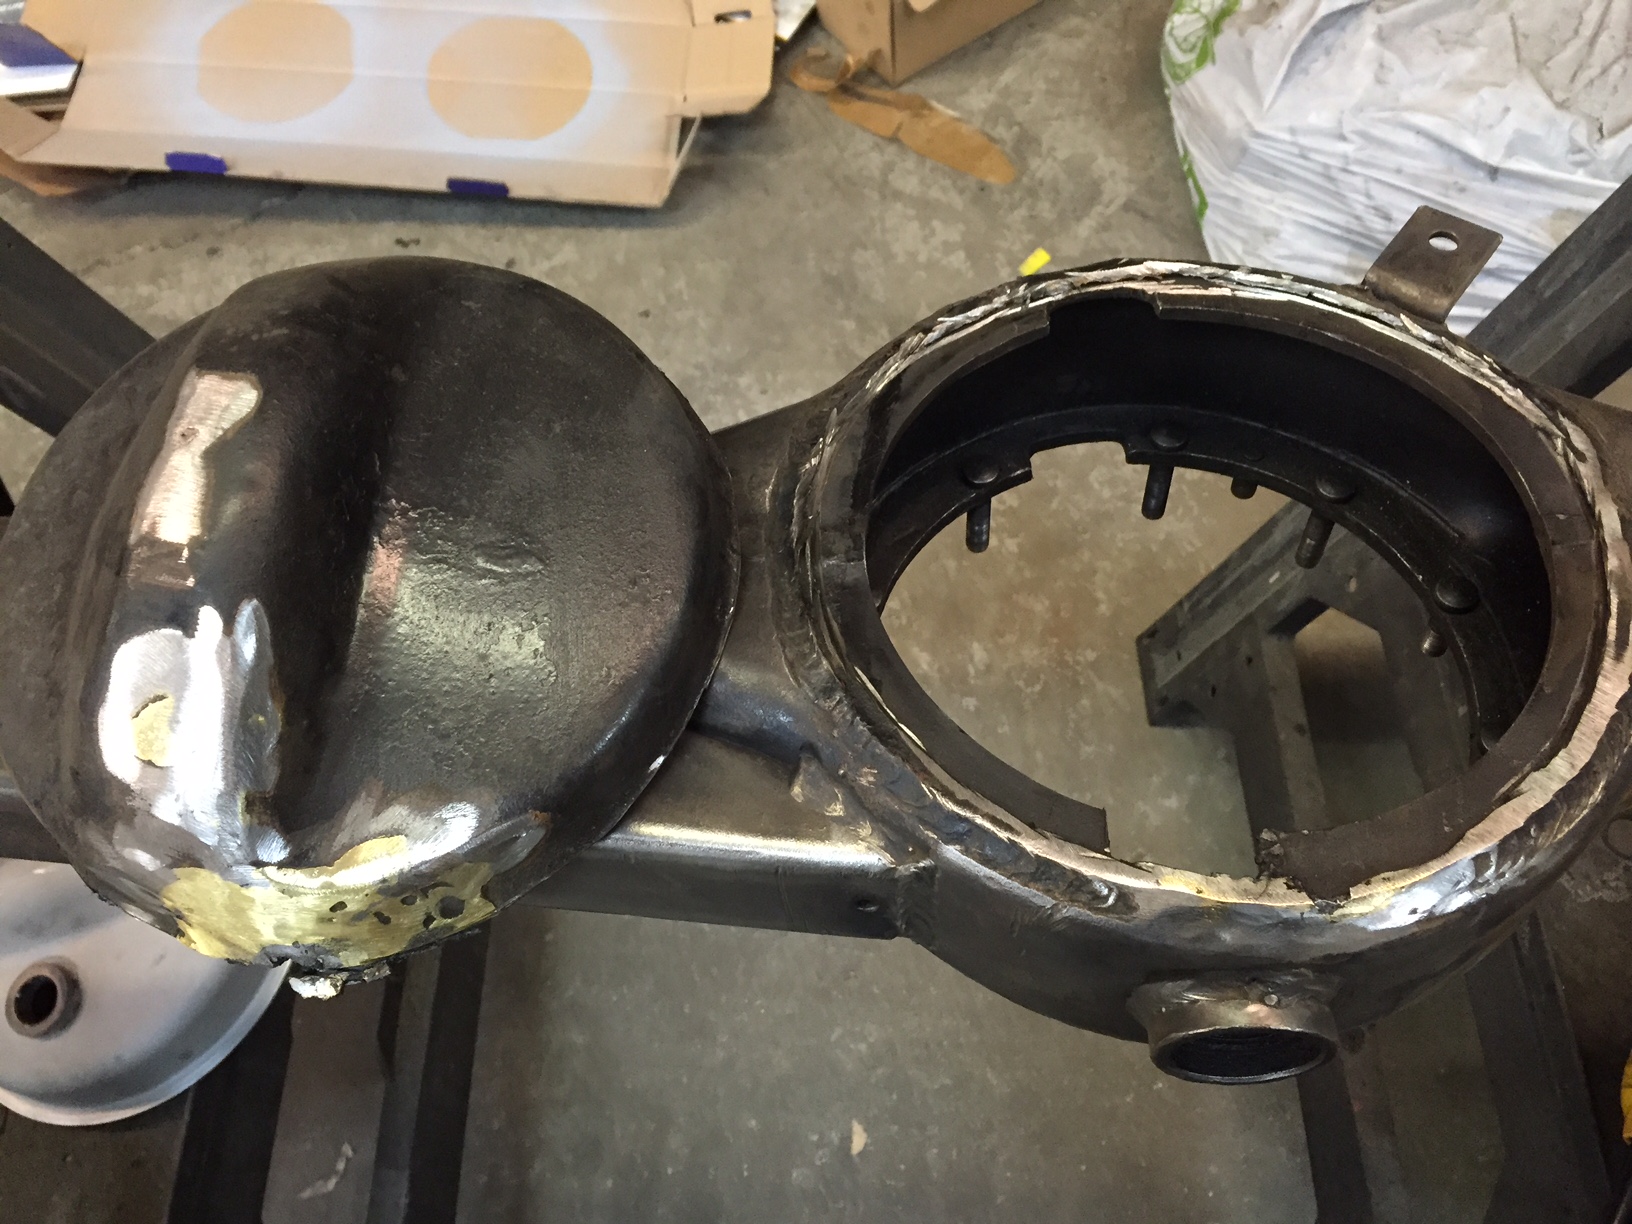
Off it comes……….these cut off pretty easily, just use a cut off wheel in an angle grinder.

Nice quality replacement courtesy of Rovers North.
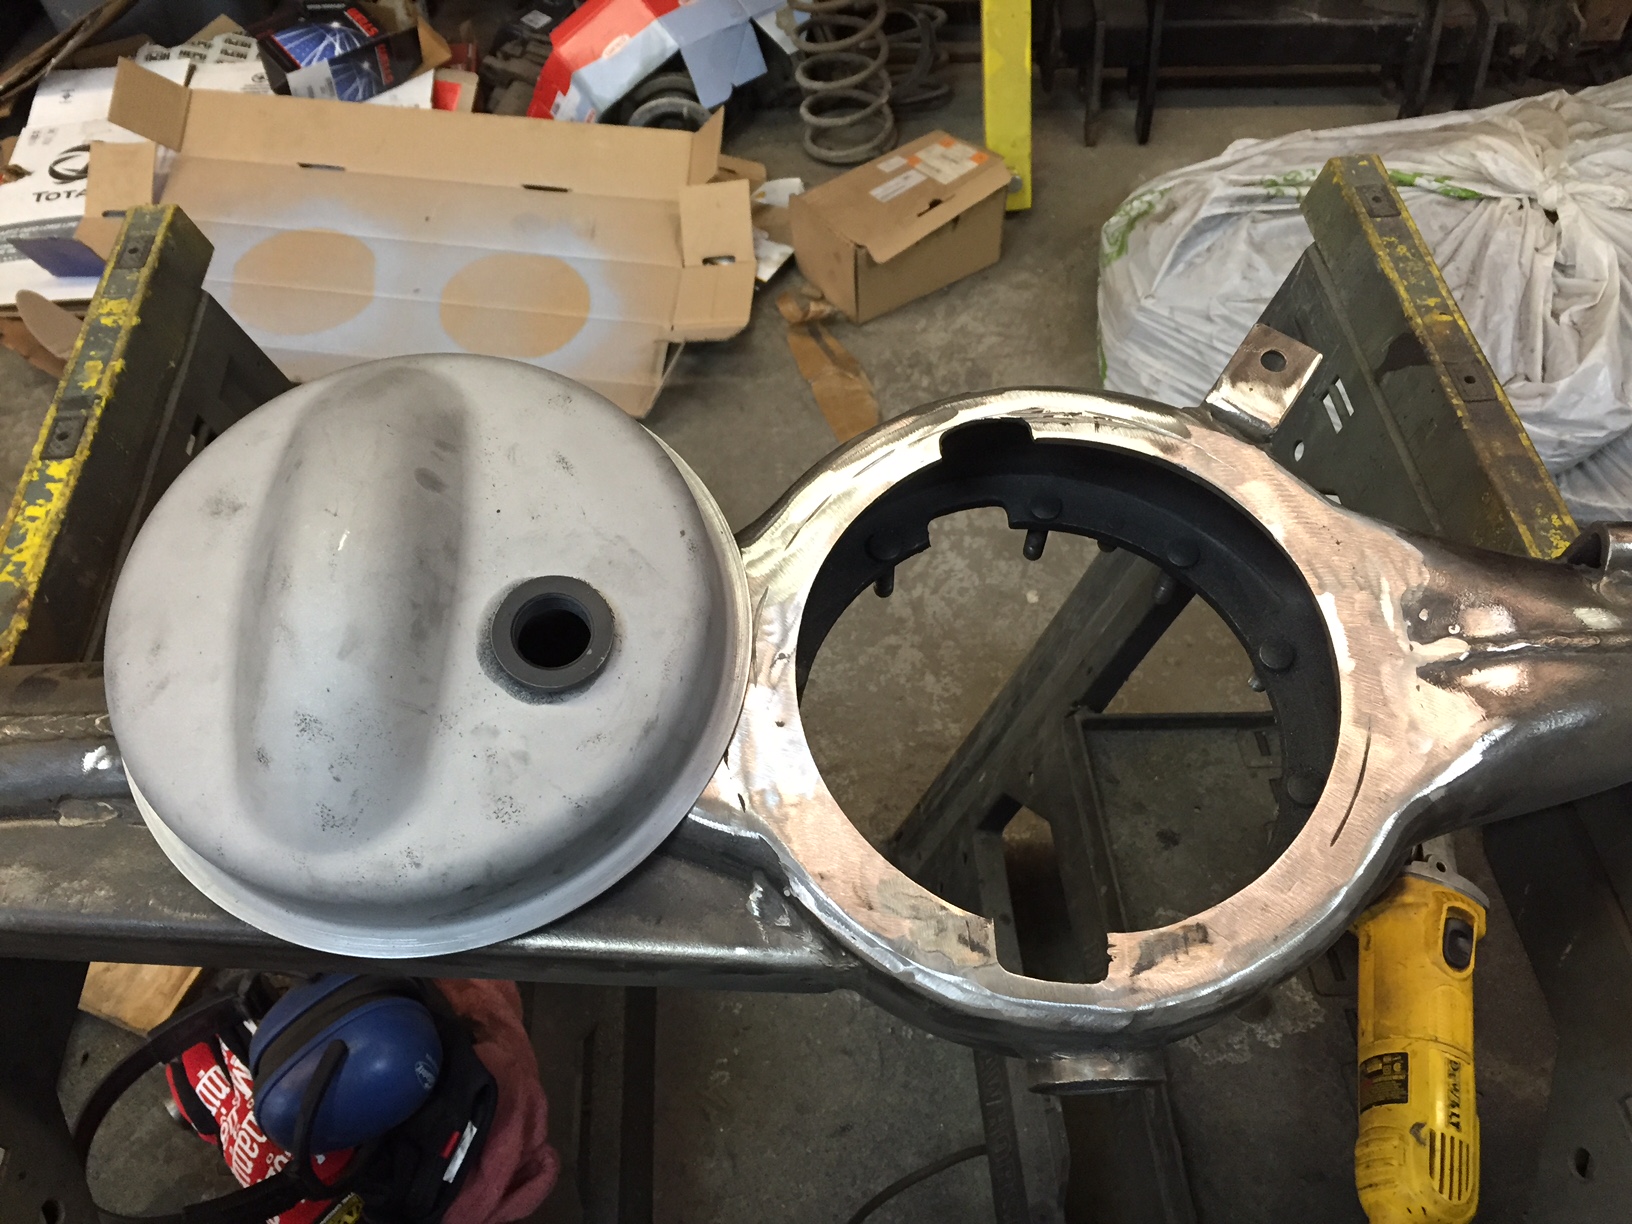
The axle housing ground flat and ready for its new cover.

I’ve been using these flap wheels for years, this is what I used to grind down the old weld on the axle housing. These things get rid of material fast, so if you’re still using the old solid grinding wheels, toss them in the trash and get yourself a few of these………you can thank me later!
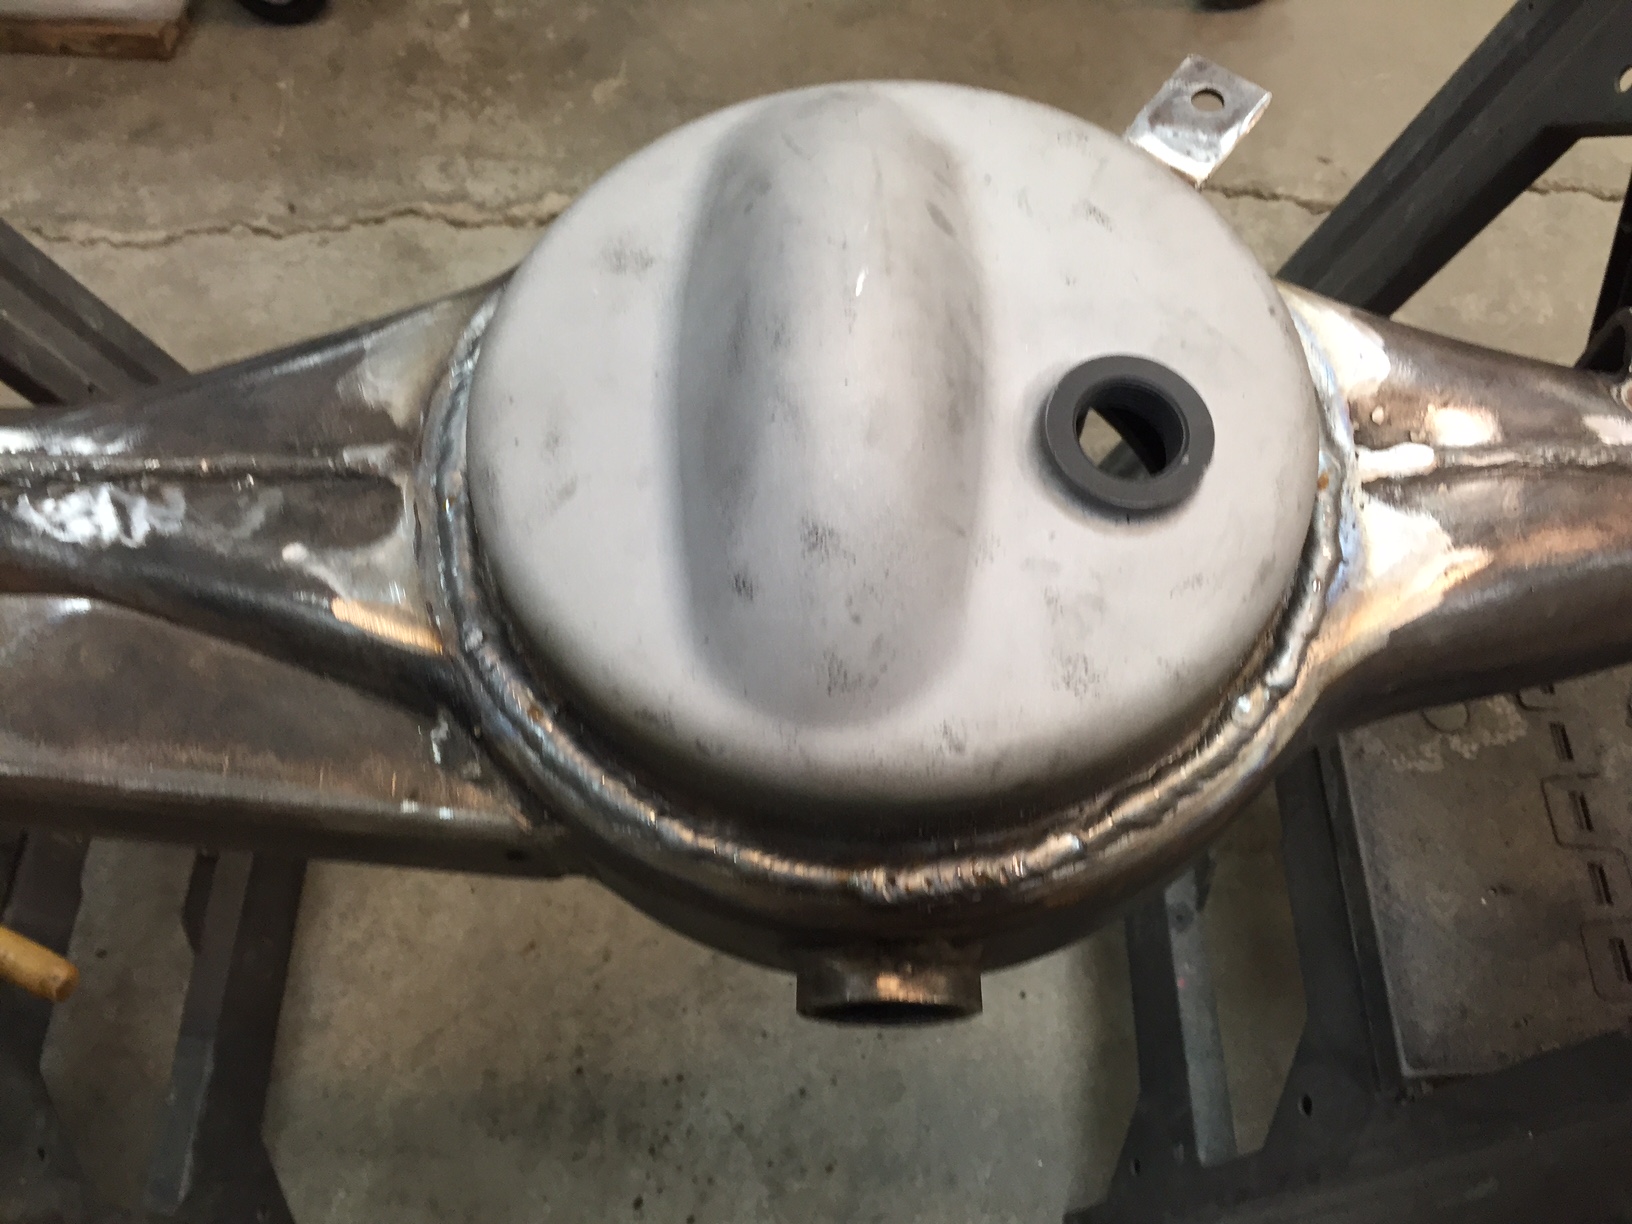
New cover welded up…..I made two passes all the way around to make sure there are no leaks!
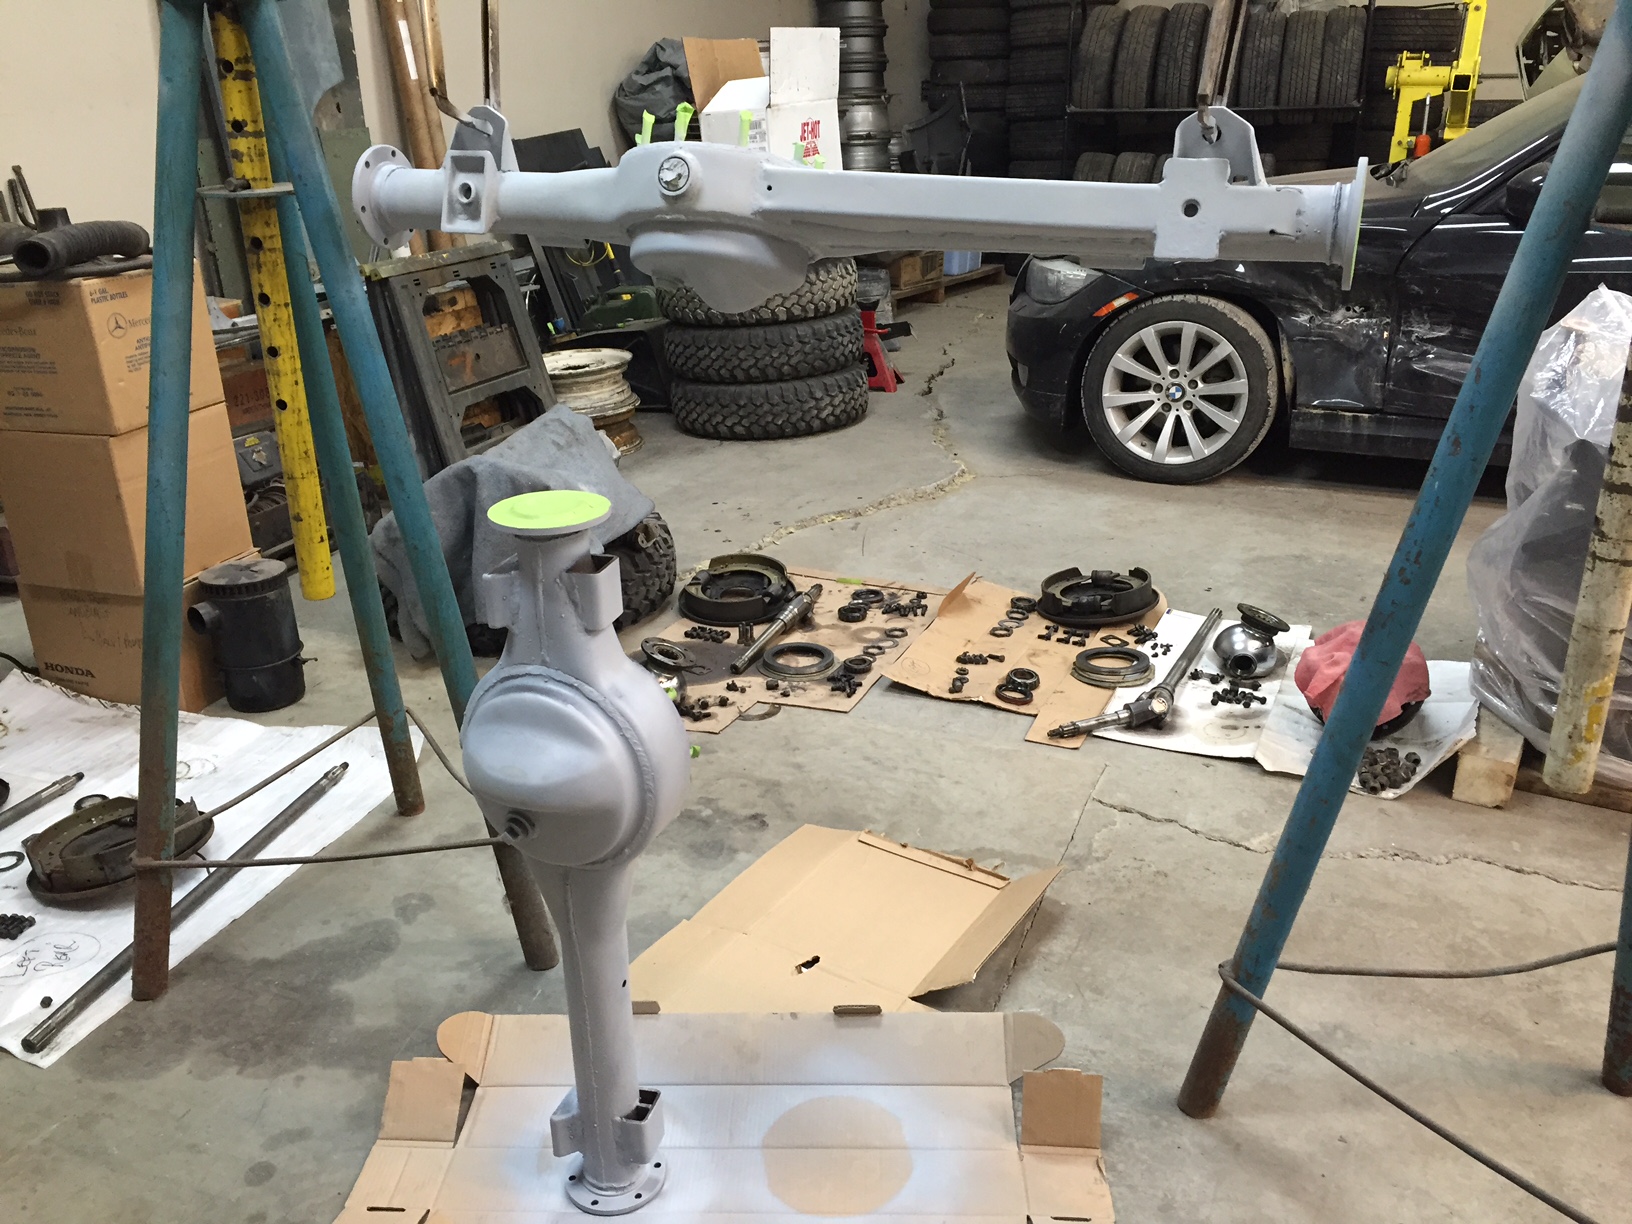
Axle tubes primed and ready to head to Autobahn for paint, along with hubs, swivel housings, drive members, backing plates, etc.
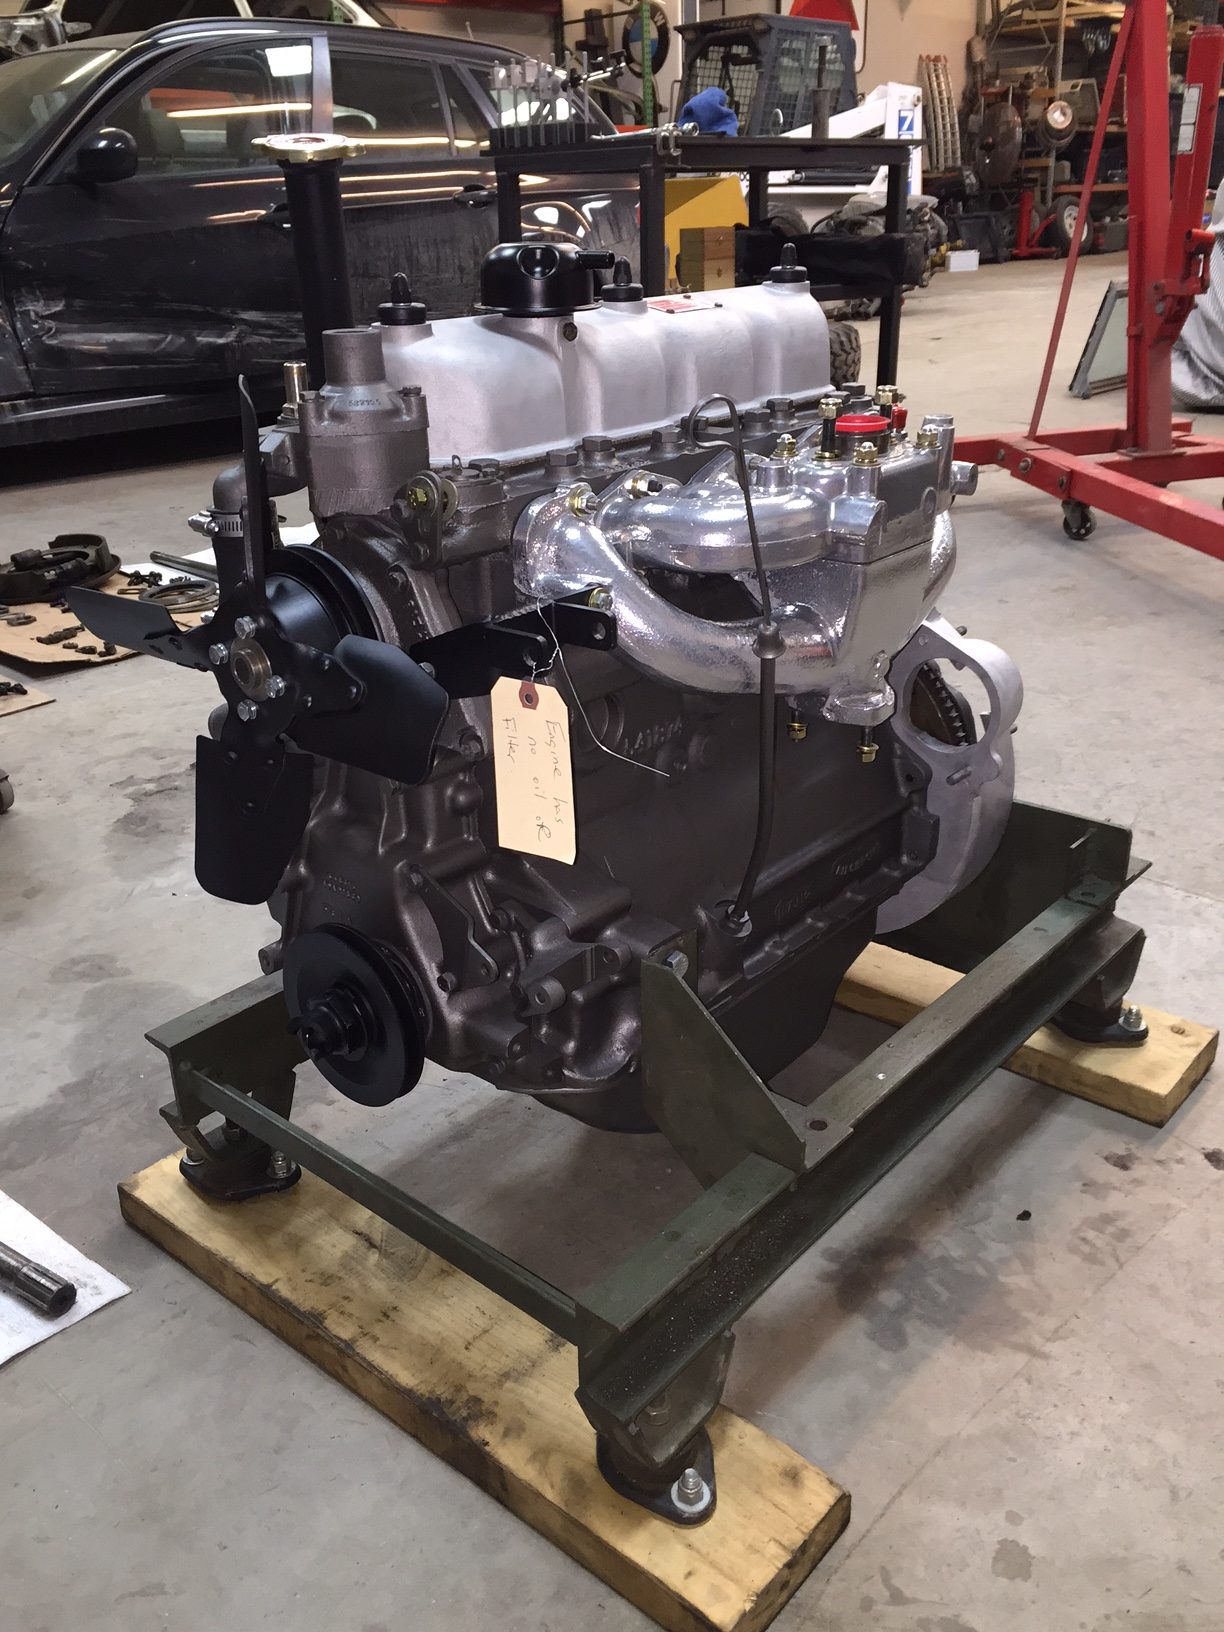
Boom!! The freshly rebuilt engine back from Vermont Engine Service………bored .03 over, 8:1 head, stellite valve seats, new clutch/pressure plate, ceramic coated intake/exhaust……just like new!
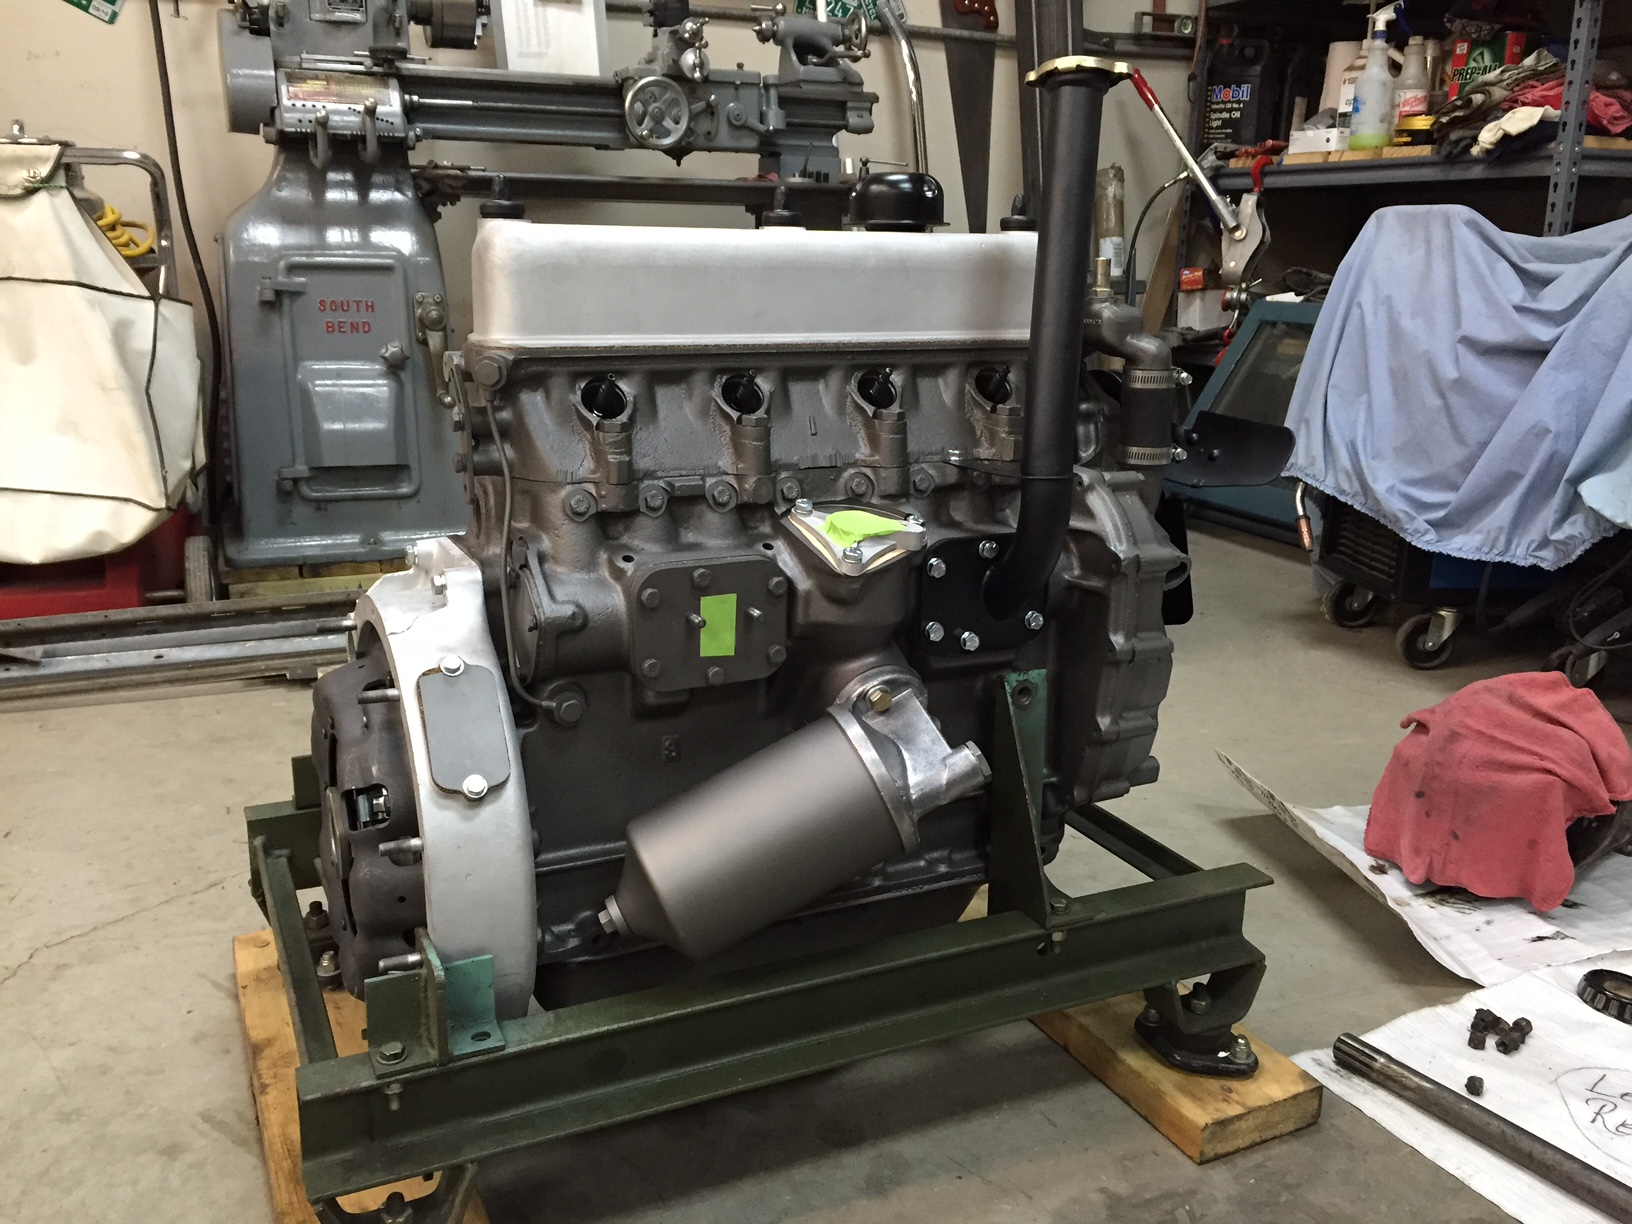 I just need to add all of the ancillaries and it’ll be ready to mate up to the transmission.

Another huge box checked……the Series 2 109 frame sand blasted, steam cleaned, and powder coated!! Thanks to Adam and his crew at Finish Solutions in Colchester, Vermont for the beautiful work!
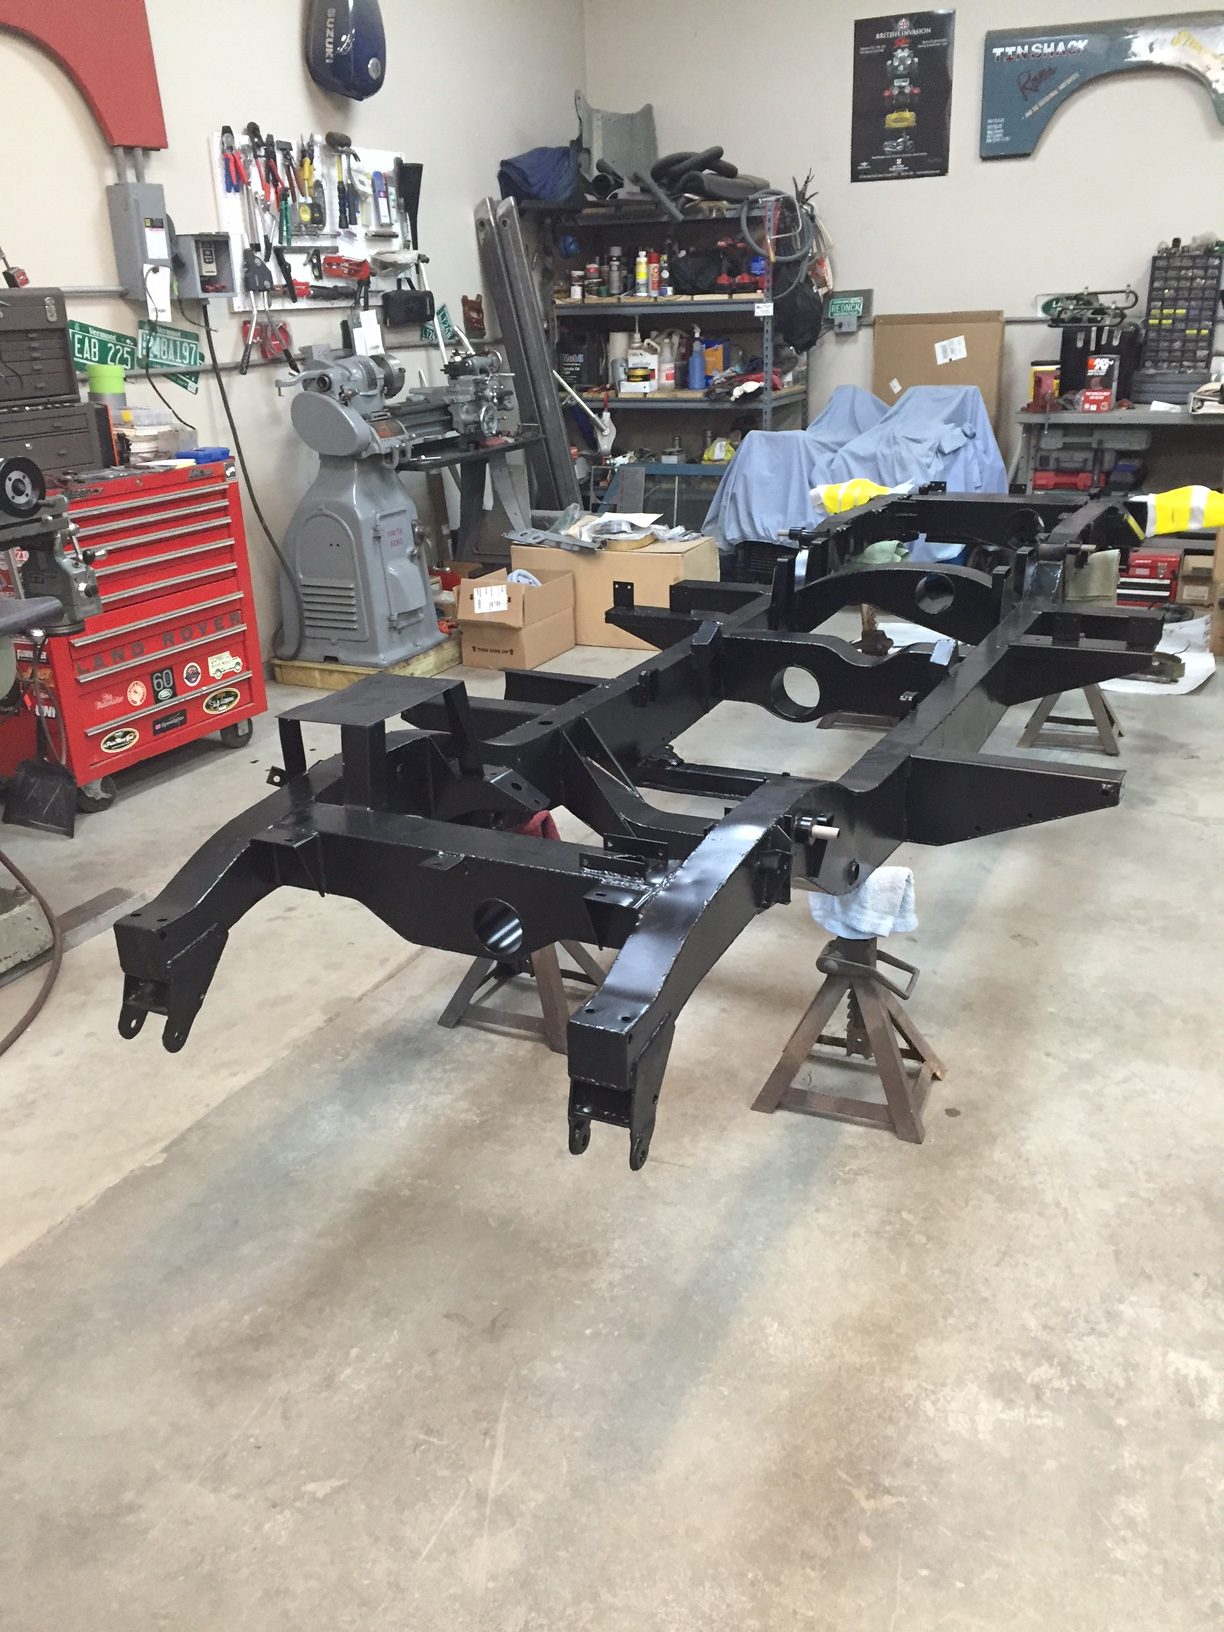
The freshly powder coated frame back in the shop. I just have to reassemble the axles and I’ll have a roller soon.
I like reading your posts and am impressed by the love north Americans give to Series Land Rovers. Why powder coating for the chassis and not galvanising then coating with something like black epoxy mastic?
My first thought was to galvanize the frame, however the galvanizers wanted to drill several 3/8 – 1/2 inch pressure relief holes in the frame for fear of one of the boxed sections blowing up in their tanks (a costly and dangerous problem if it occurs). Lanny Clark has an original frame that a customer had done this to and it looks like hell……..so that just wasn’t an option for this frame….it’s too nice. Finish Solutions sand blasted, power washed, steam cleaned, epoxy coated, then powder coated the frame……prior to all of this I had borrowed a borescope to inspect the interior of the frame, and aside from an old mouse nest in the right front frame horn, the interior was as nice as the exterior, so the appearance and durability of powder coating made the most sense to keep the frame intact.
Sounds like a great combination.
Hi! Stumbled across your website, wonderful read! I need to replace my rear dif cover also, did you try to find a replacement cover that didn’t have the filler hole in it like the original?
Hi David,
Happy to hear you enjoyed the site. To be honest, I didn’t even give a second thought to searching for a “hole-less” diff cover. The covers that Rovers North sell are very stout, and well made…….hence easy to weld, so that’s the way I went.
Wow – great guide for other behind trying to do restorations. Thanks for putting together this page!
I was wondering how you figured out where/how things should be installed… do you have a diagram? I have a similar car which is in bad enough condition and modified throughout the years that is hard to tell where things go. 🙁
thanks!
Hi Dustin, glad you’ve found at least some help here. I think what will help you most with the assembly of a truck, say from a pile of parts in the garage, will be a Series truck parts manual, lots of exploded parts diagrams, etc. You can usually find them on Ebay, just make sure you’re buying for the correct series of truck 1,2,2A,3.