
 I’ve restored a lot of these old banjo wheels and have had one of Lanny Clarks waiting to be brought back to life for a few weeks now. So while I’m waiting for the Triumph frame to come back from paint I figured a “how-to” on restoring banjo wheels might help some owners out there.
Day One

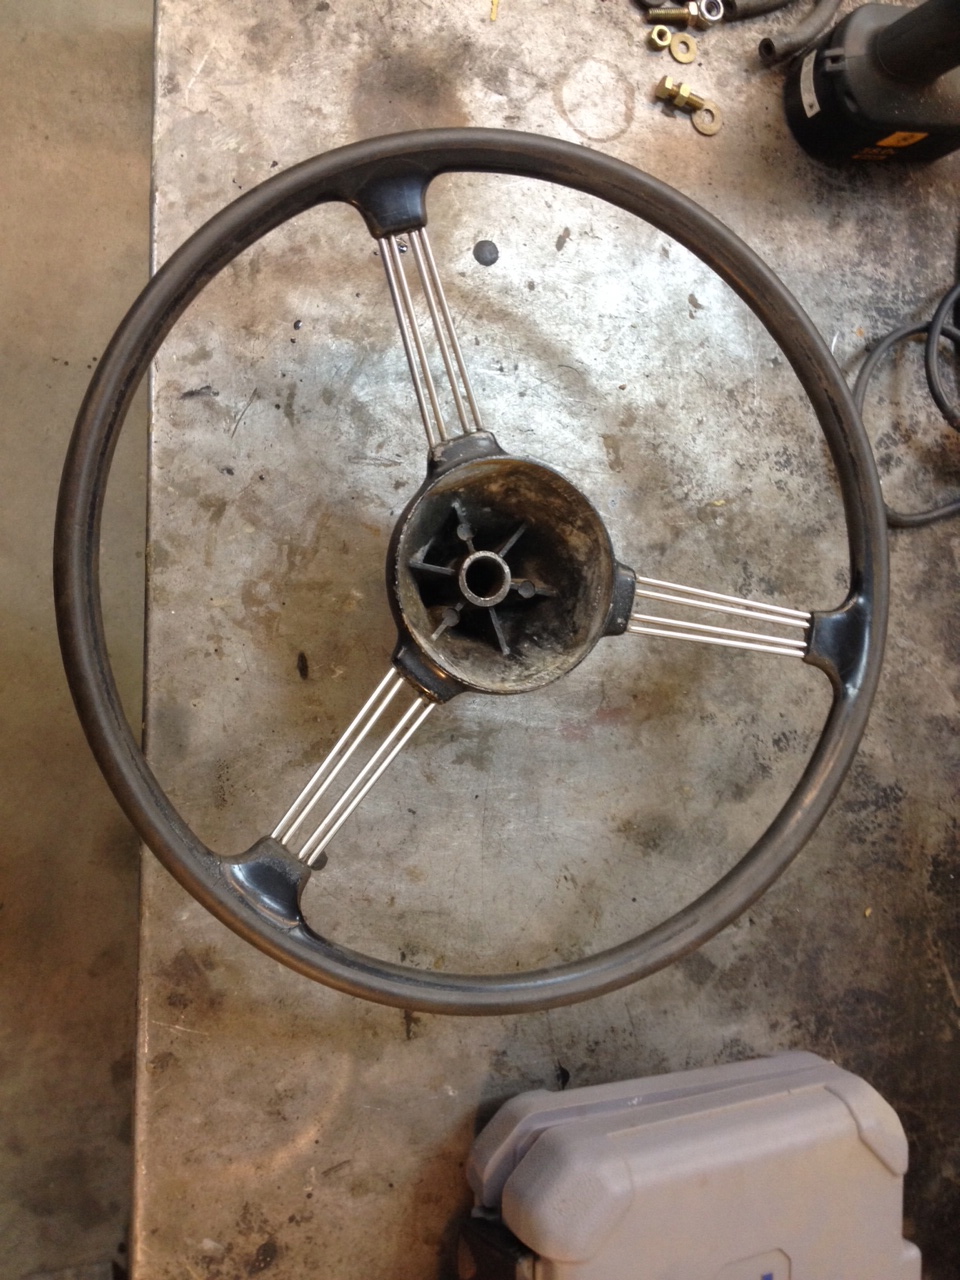
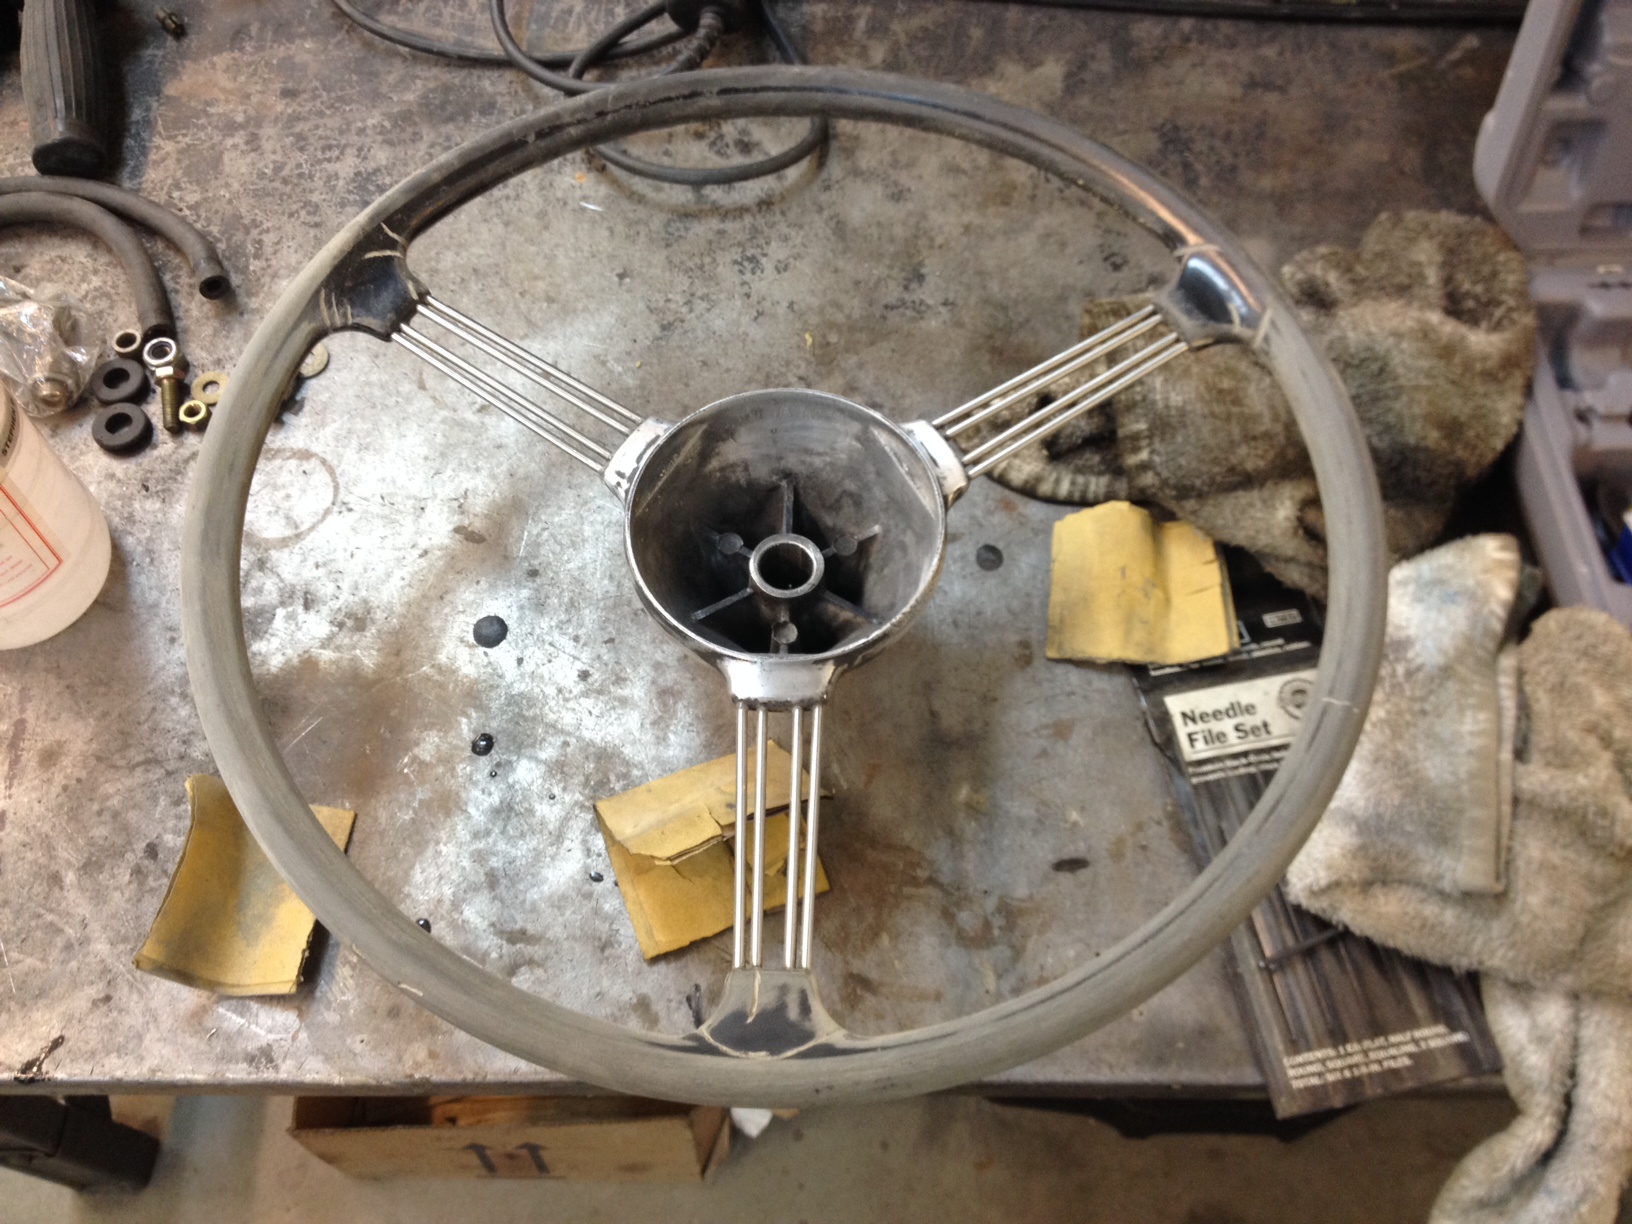
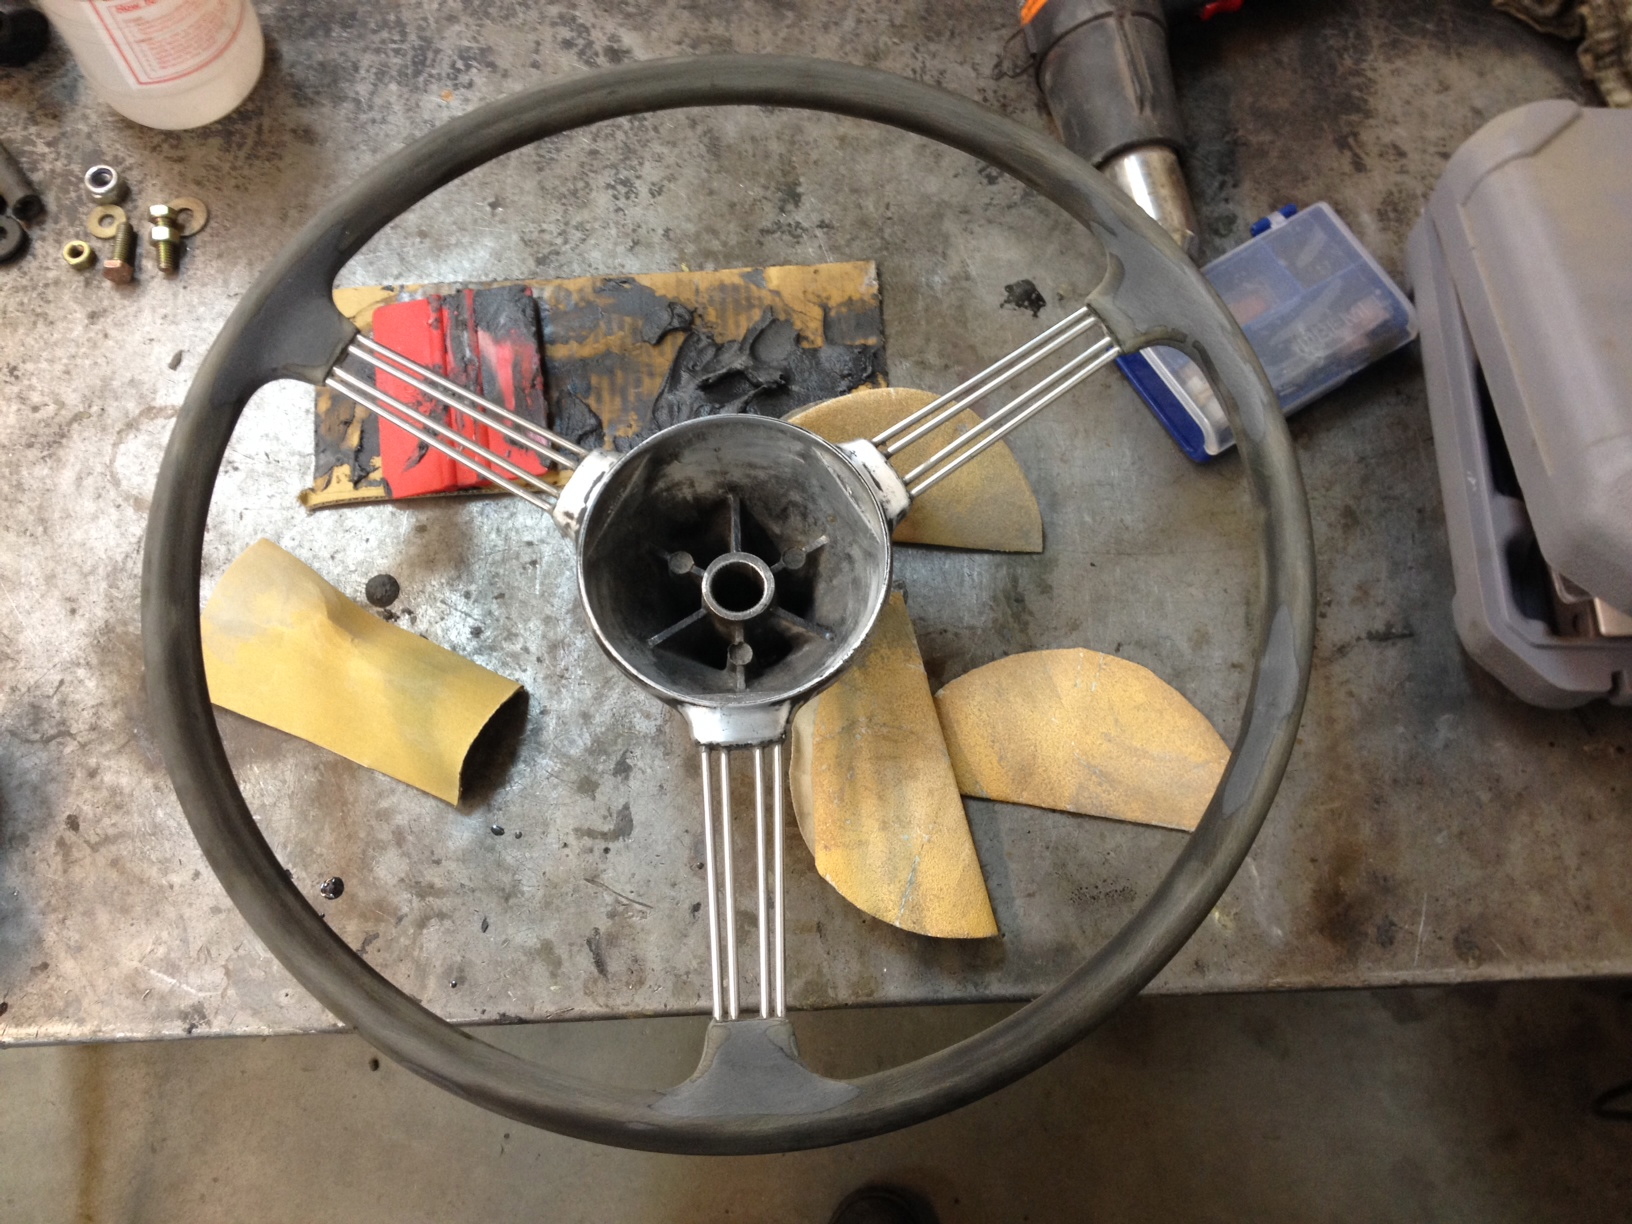
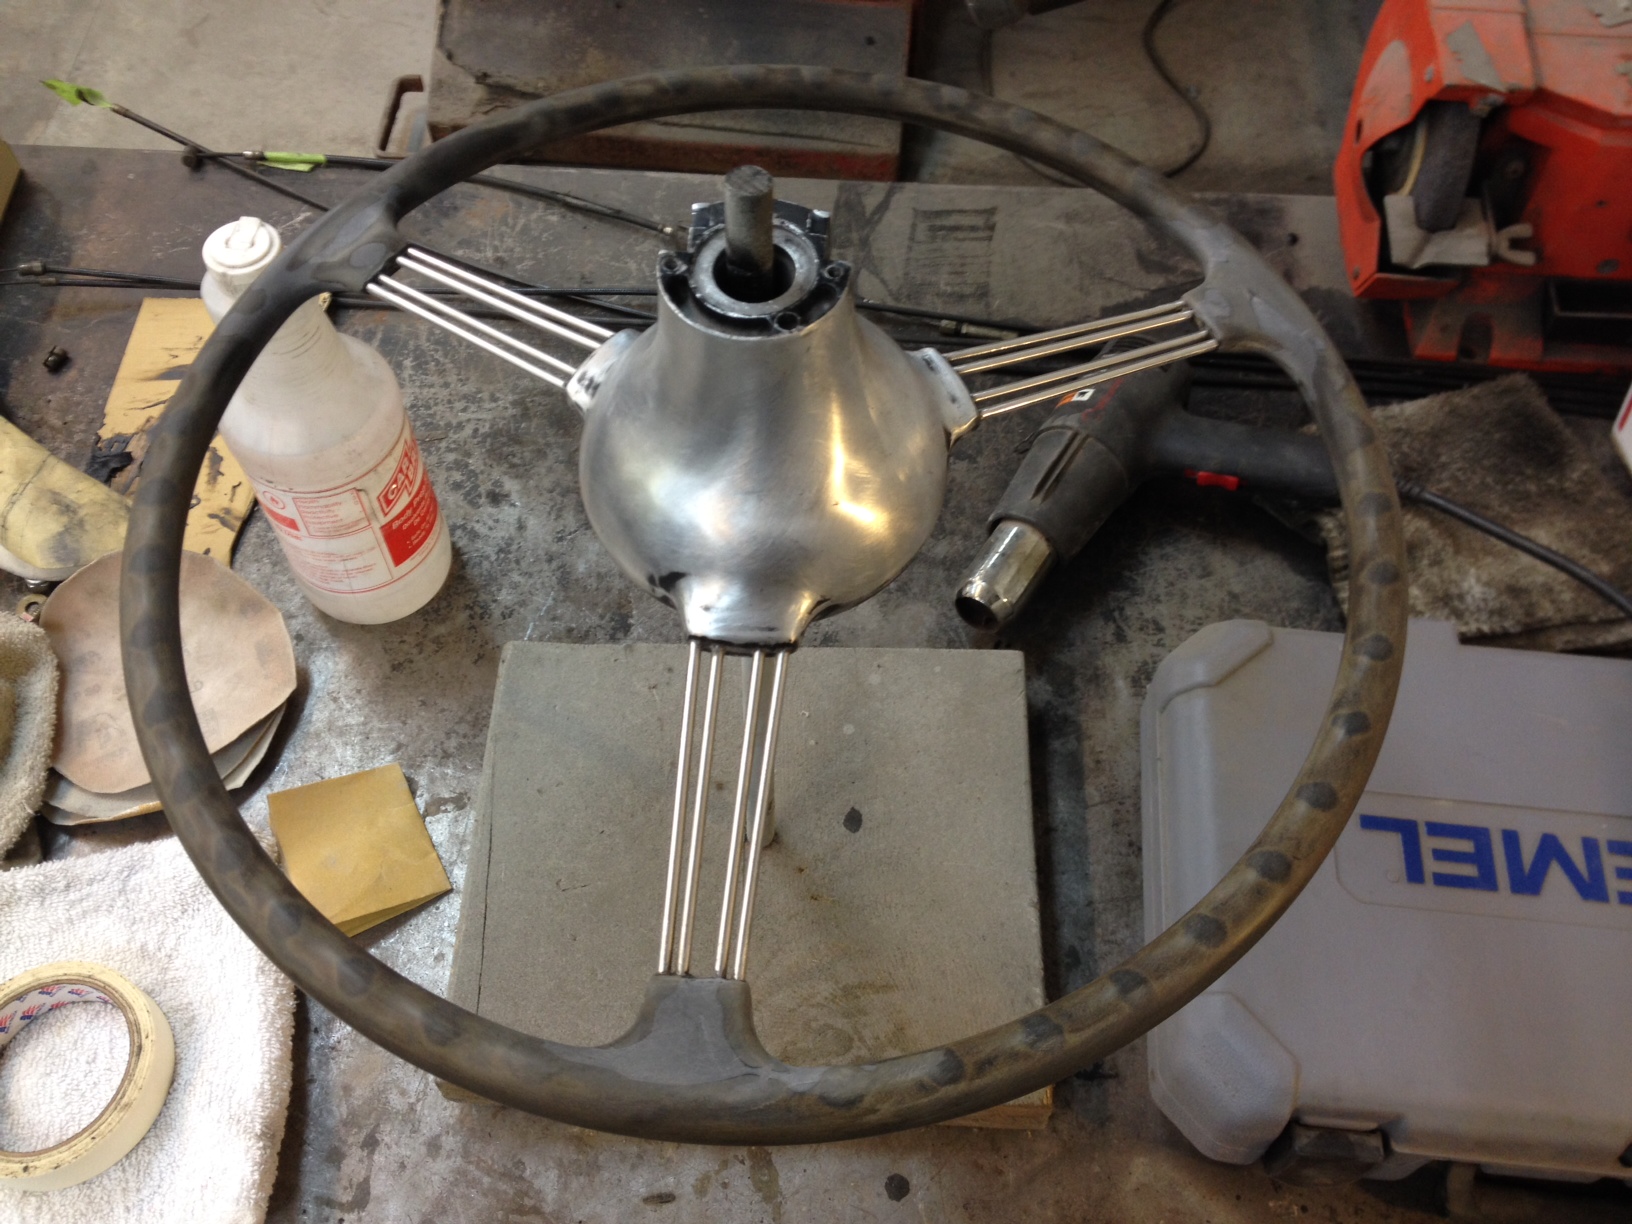
Here is the wheel, it’s actually in really nice shape compared to most. Just some light cracking around the spokes and some tool marks on the hub.
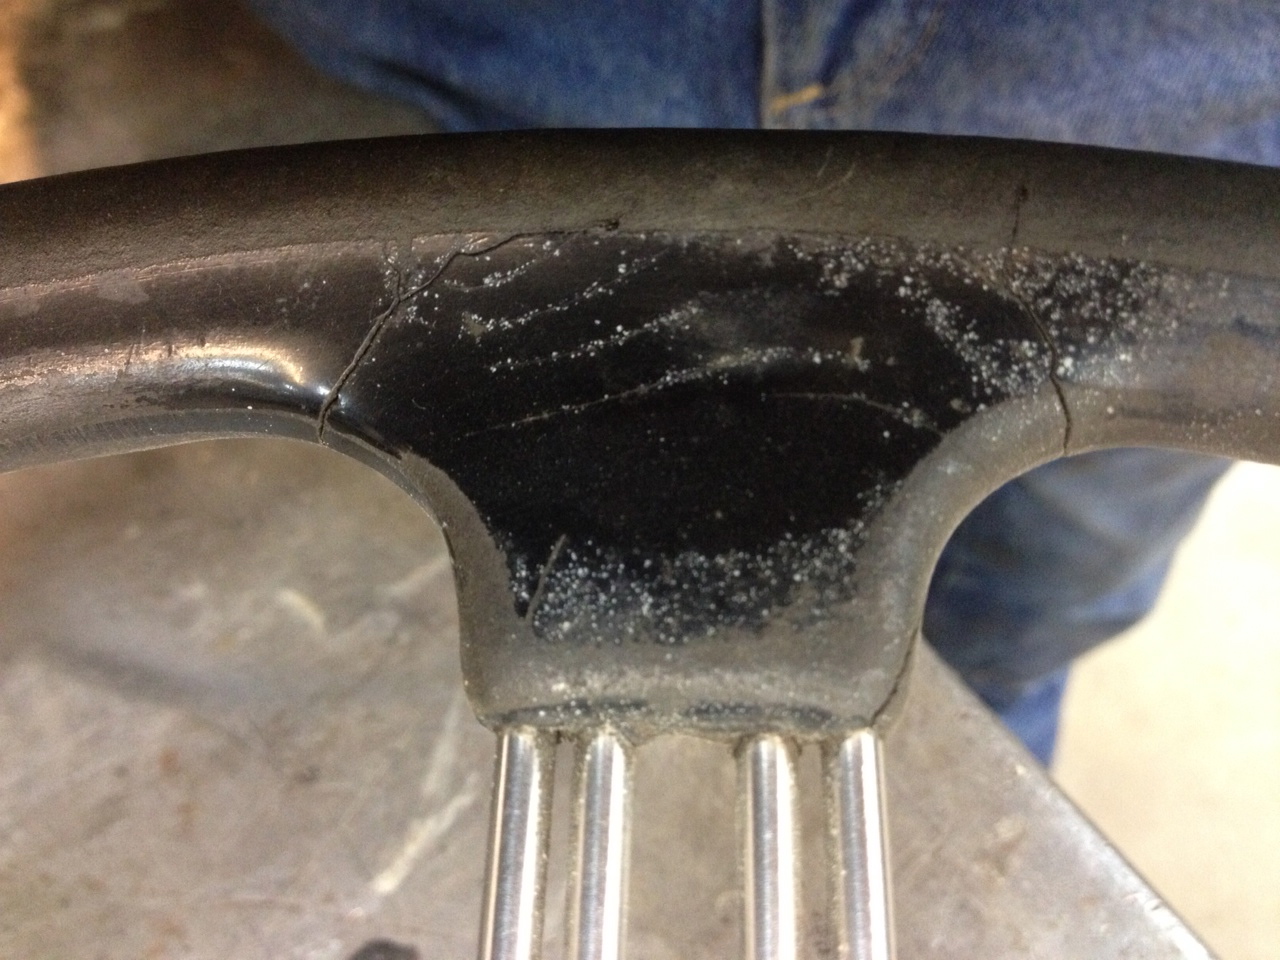
Typical cracking. I use a Dremel tool with one of two carbide bits to open up these cracks a bit before being filled.
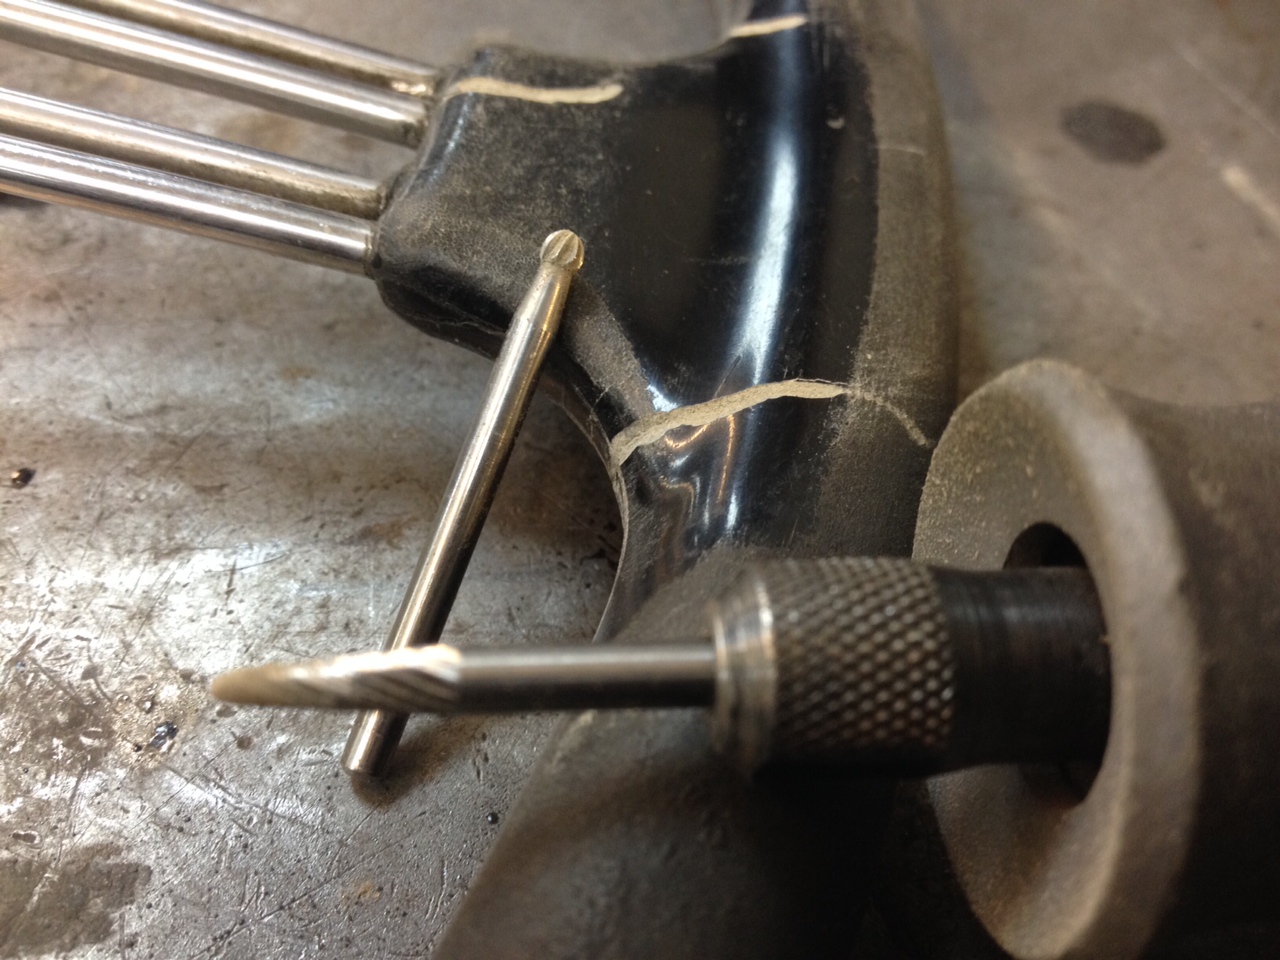
The two bits I use. You can see in the background the resulting troughs to be filled. Be VERY careful if you decide to do this, the bakelite goes away really fast at the touch of these bits.

After you’ve made a dusty mess with the Dremel use a high quality body shop quick drying cleaner to wipe the wheel down.

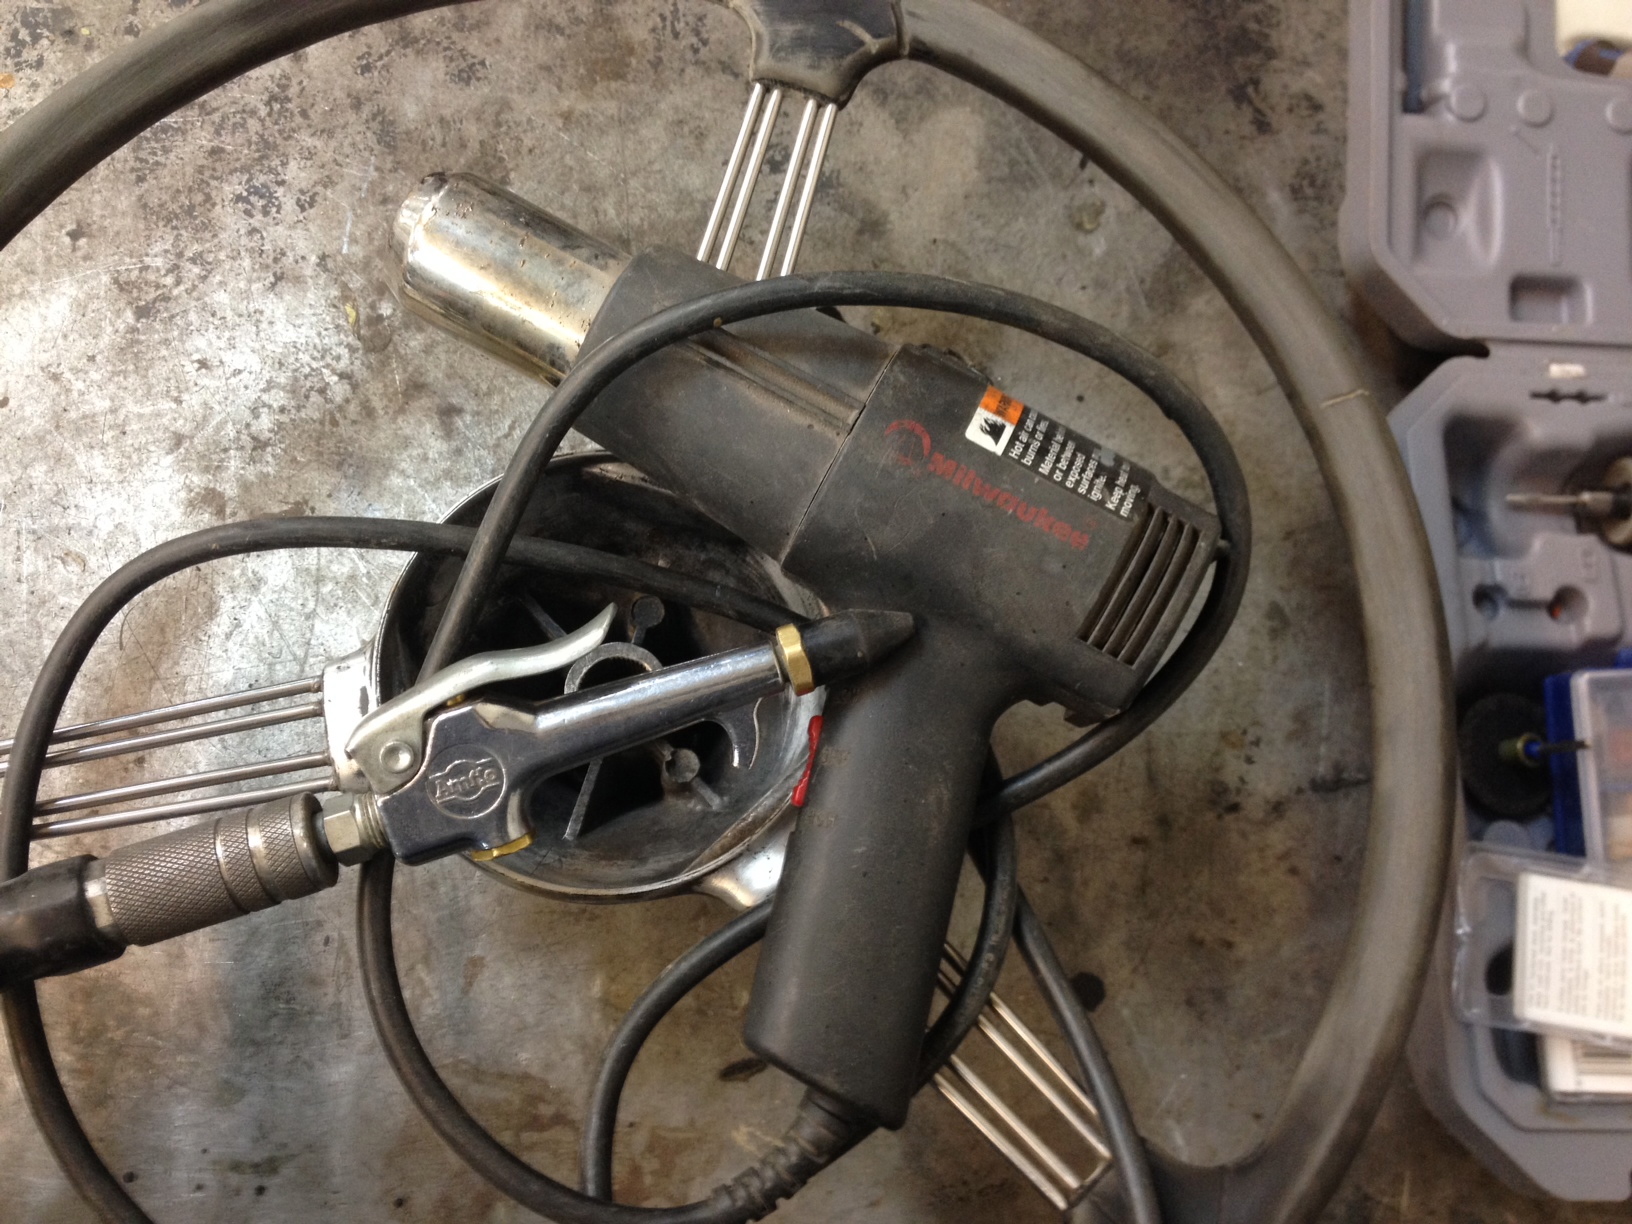
After auguring out all the cracks in the bakelite I usually start on the aluminum hub with the sand paper and then move out to the rim. I use this soft stainless brush above to get in all of the tight spaces in the hub.

I start with 180 grit paper to get most of the paint off of the hub and uncover any old damage that may need to be repaired. You may be tempted to break out a wire wheel or flap wheel here but don’t, the hub aluminum is super soft and using mechanical strippers will just create way more work for you.
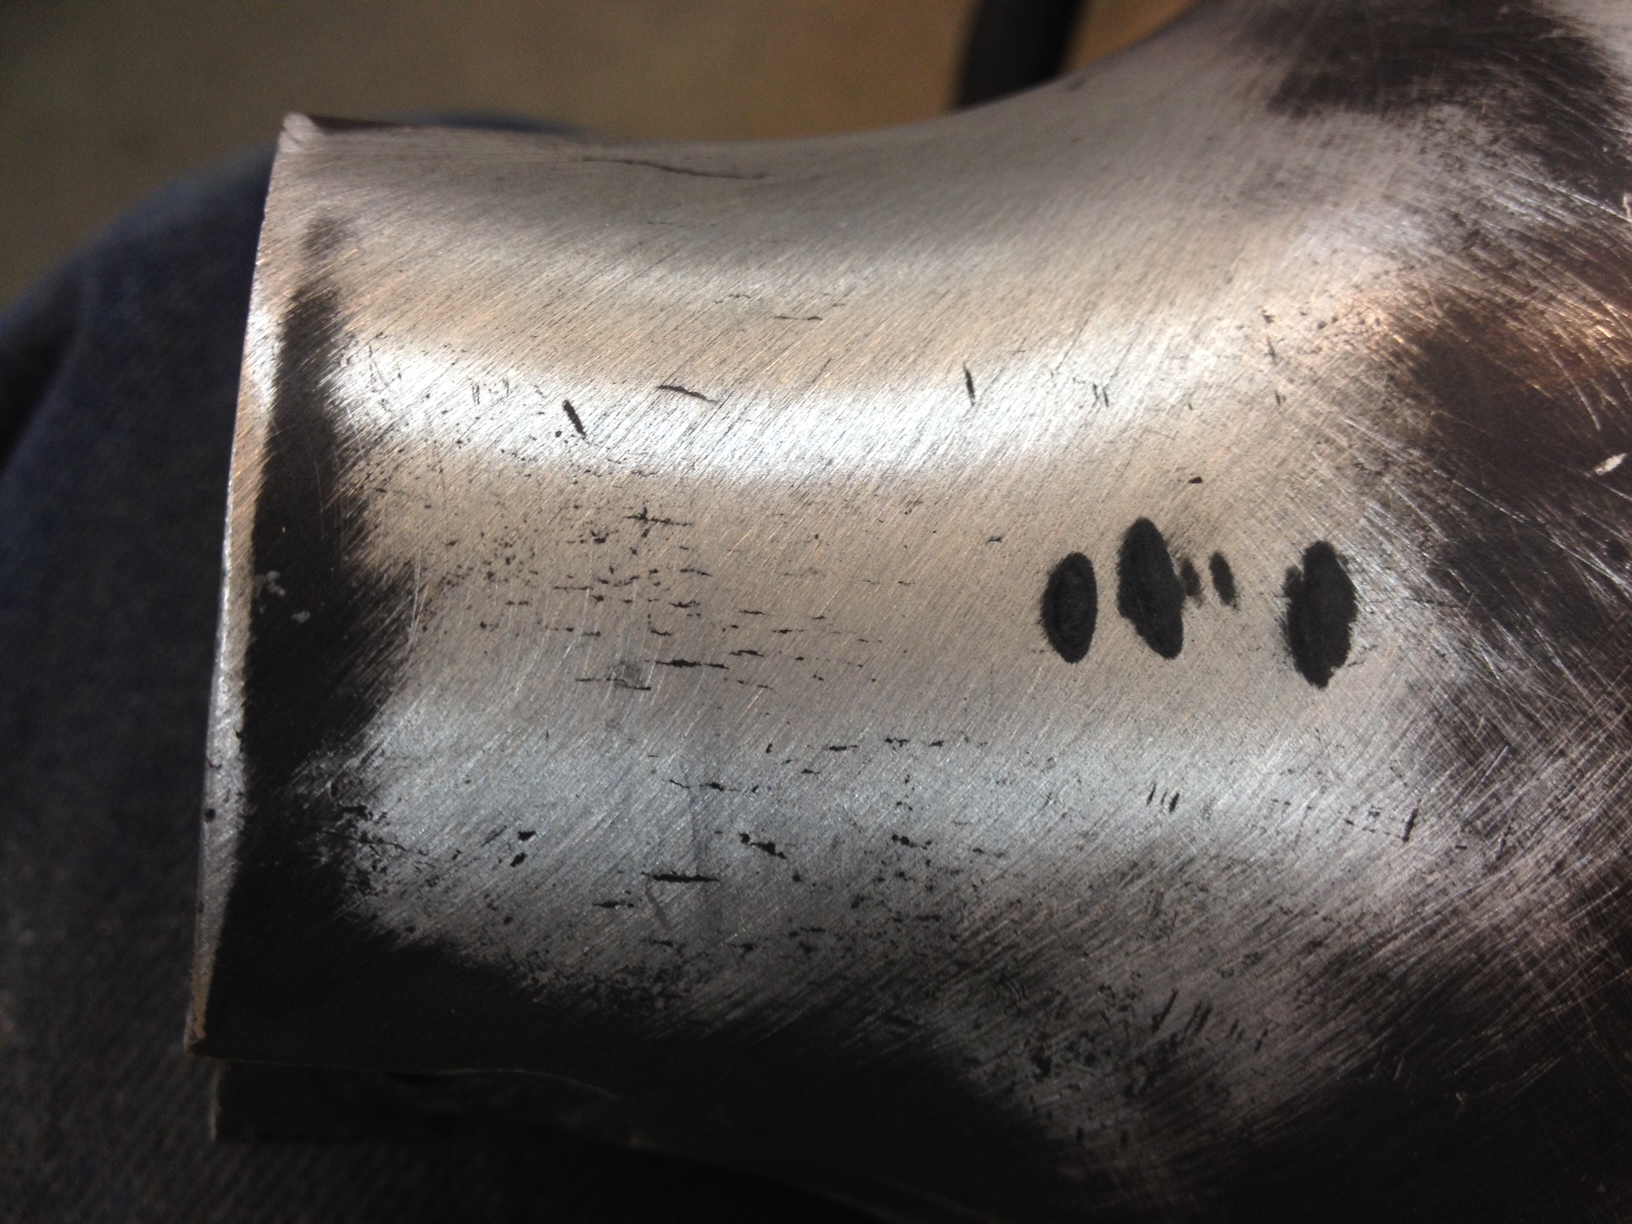
An example of old tool damage under the paint. With patience and elbow grease this kind of damage can be worked out with the 180 grit paper.

Progress.

Close.
And gone…………smooth!!

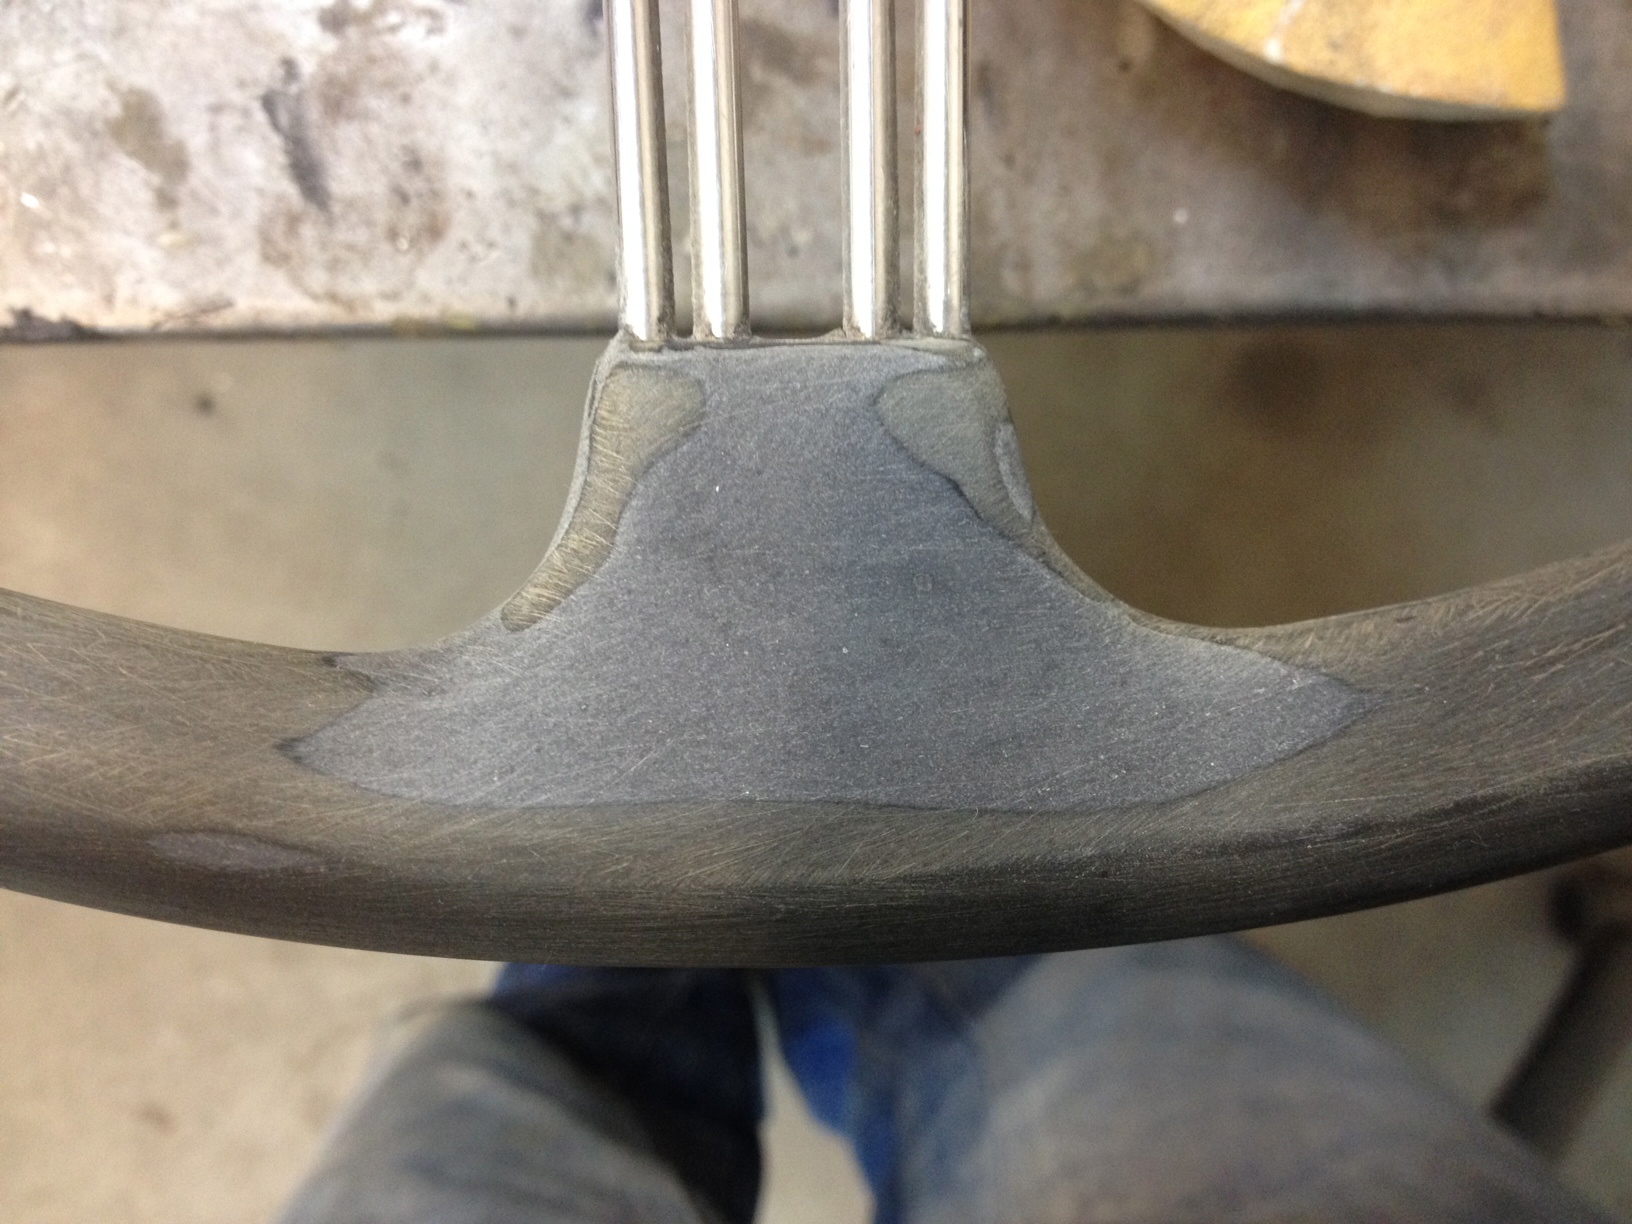
Once the hub is cleaned up it’s time to move out to the bakelite rim. I use the same 180 grit to start. Again, be careful, 180 grit paper is pretty aggressive on old dried out bakelite, you can sand away your whole wheel pretty quickly.
You just want to get rid of old paint while maintaining the shape of the wheel, and you’ll find more age cracks along the way.
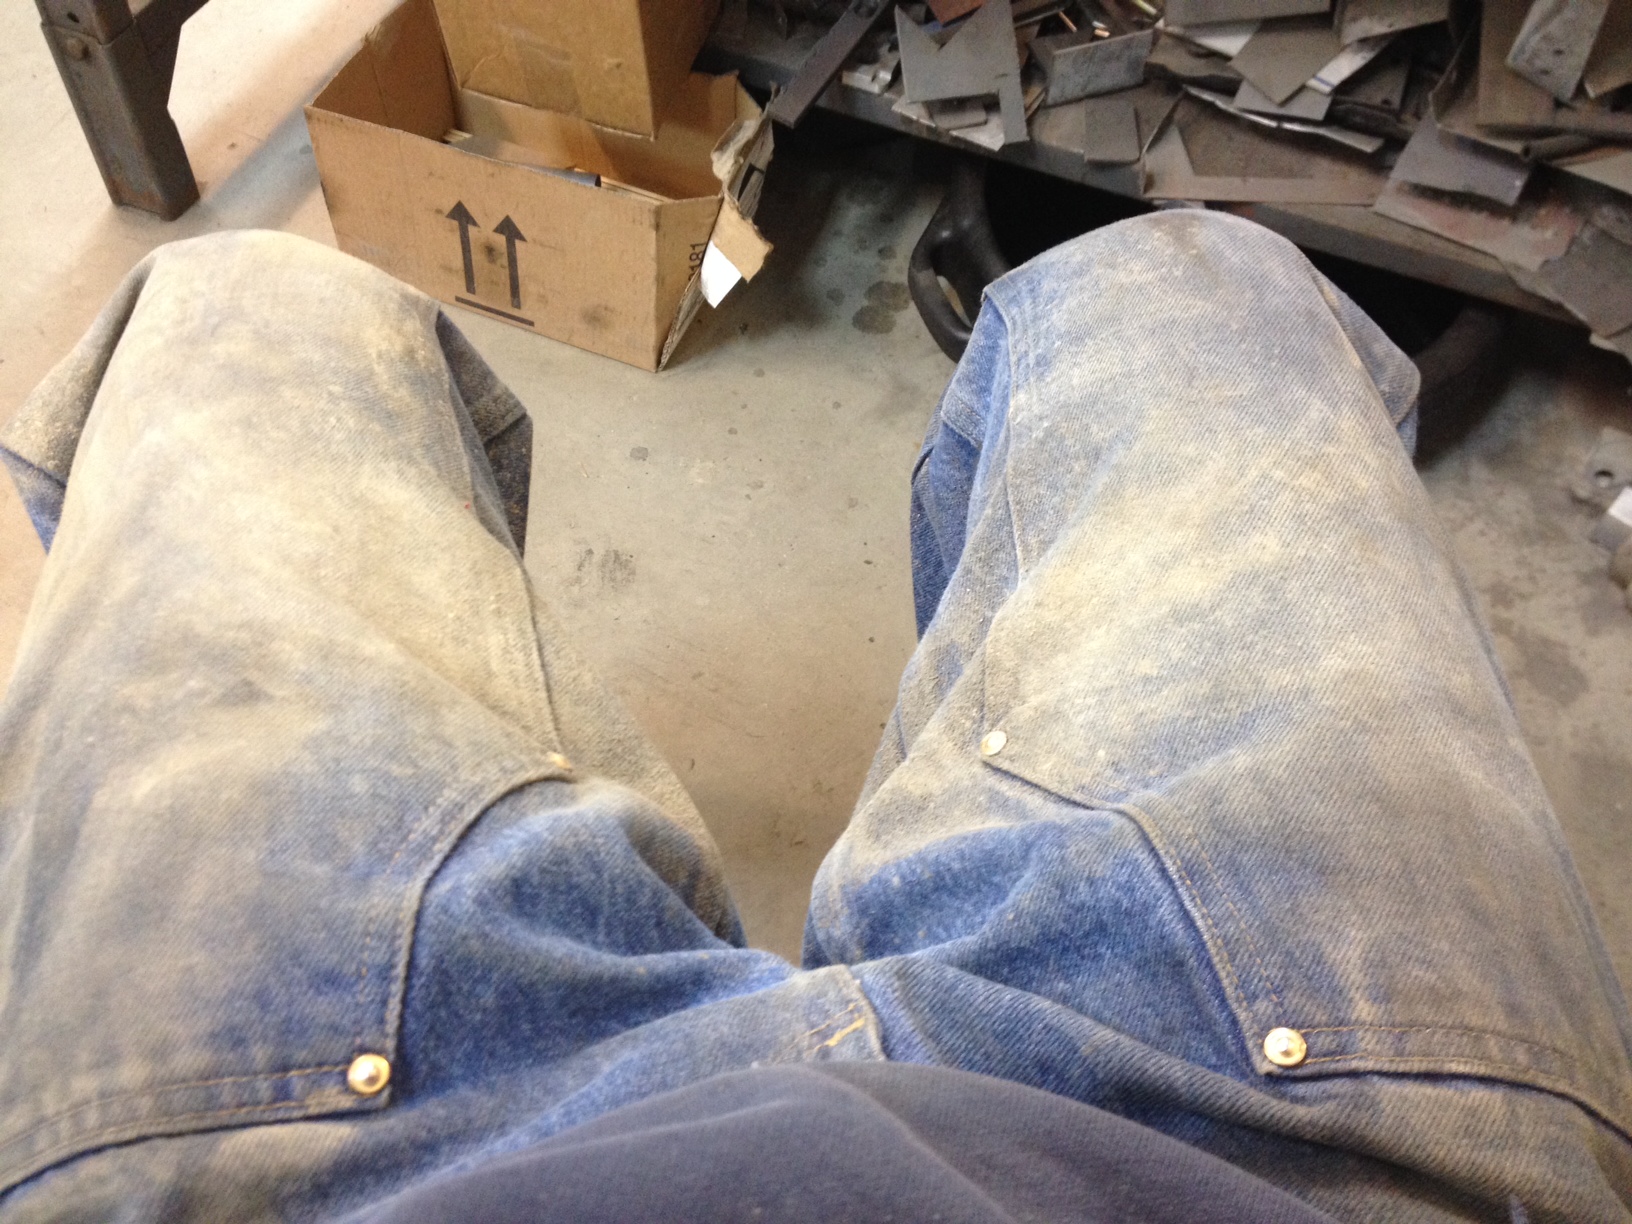
And this is what your pants are going to look like after sanding an old banjo wheel for the better part of an evening.
We’ll continue tomorrow night………I’m sick of sanding!

Day Two
I’ve finished up with the 180 grit paper. Now it’s time to wipe down the wheel and use compressed air to blow out all the areas to be filled.
Wipe down the wheel with the solvent of choice. I then use a heat gun on low to dry up any residual cleaner (the bakelite really soaks up the cleaner after being sanded) then on to the compressed air to blow everything out of the cracks.

Here’s the filler, PC-7, available at your local hardware store. Mix in a one to one ratio, this stuff is really thick and heavy so pick your mixing tool wisely.

Now the mess……I’ve tried various spatulas but found that using my index finger works best. You have about a 45 minute work time, at about 15 minutes you’ll notice the epoxy sinking a bit into the cracks so just keep working around the wheel with additional epoxy. Oh, and it’s a forgone conclusion that you will miss at least one crack and have to mix another batch.

Here’s what the epoxy looks once filled and settled.

Done. Cure time is about 24 hours @ 70 degrees. I’ll bring the wheel home and put it in front of a heat source………….and smell up the house (this stuff smells like burned hair).
Next up will be sanding and shaping the epoxy…….lots of work, this stuff is rock hard once cured. Hopefully I haven’t missed any cracks or scratches so I can move on up the sanding ladder.
Day Three
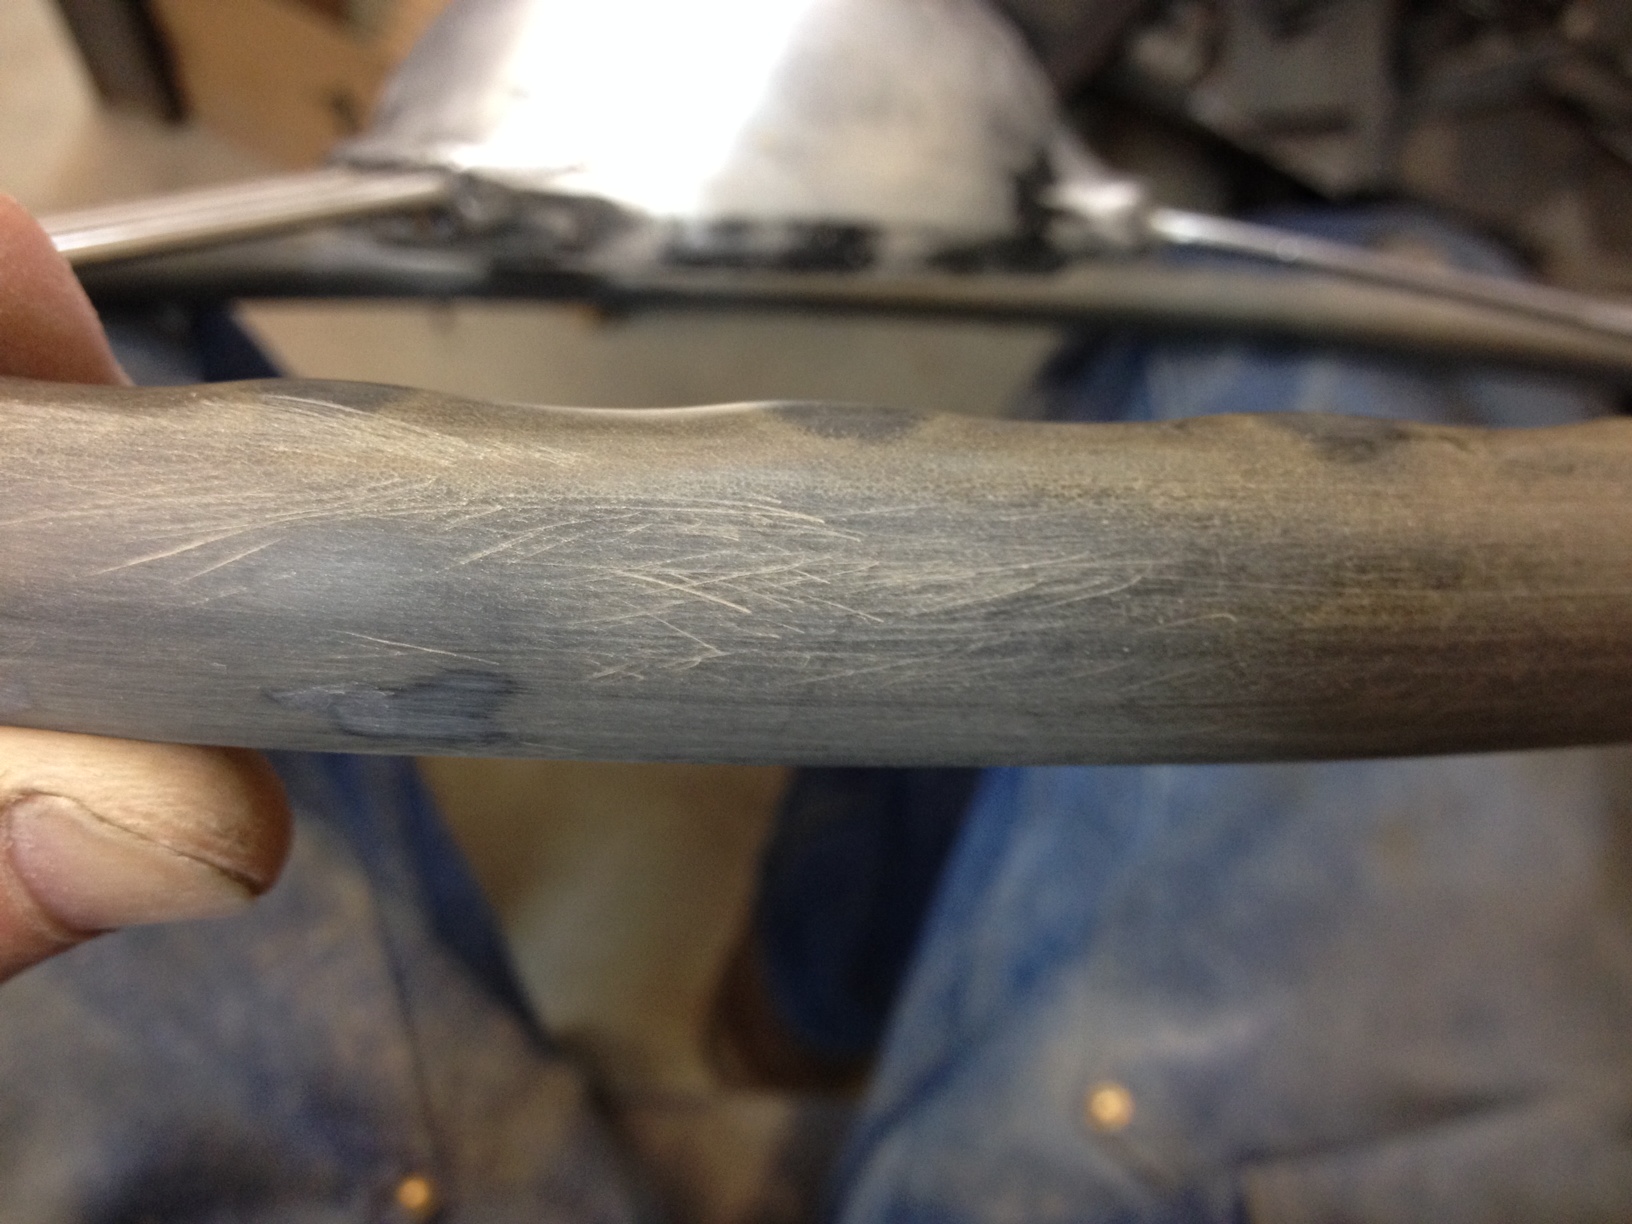
The epoxy has hardened, time to sand. I start with 80 grit, this epoxy is hard so be patient………..also be careful with the 80 grit paper, try to stay on the epoxy only, this aggressive paper will really put deep scratches in the old bakelite. Once the epoxy is knocked down and starting to take shape switch back to the 180 grit paper. From 180 move to 320 grit, pay close attention to scratches left by the 80 and 180.
You will end up with patches that look like this, and the next step is 400 grit then High Build Primer, that is if you haven’t missed any old damage or cracks, I did. So, I have two small cracks that surfaced during sanding. I mixed up a small batch of PC-7, filled them, and the wheel will come home with me again to sit in front of the heater overnight. The joys of restoring bakelite!
Day Four
Last couple of cracks have been filled and sanded. Now move on to 320 grit paper. Make your way around the wheel looking for left over scratches like in the photo above. The 320 paper will rub these right out.
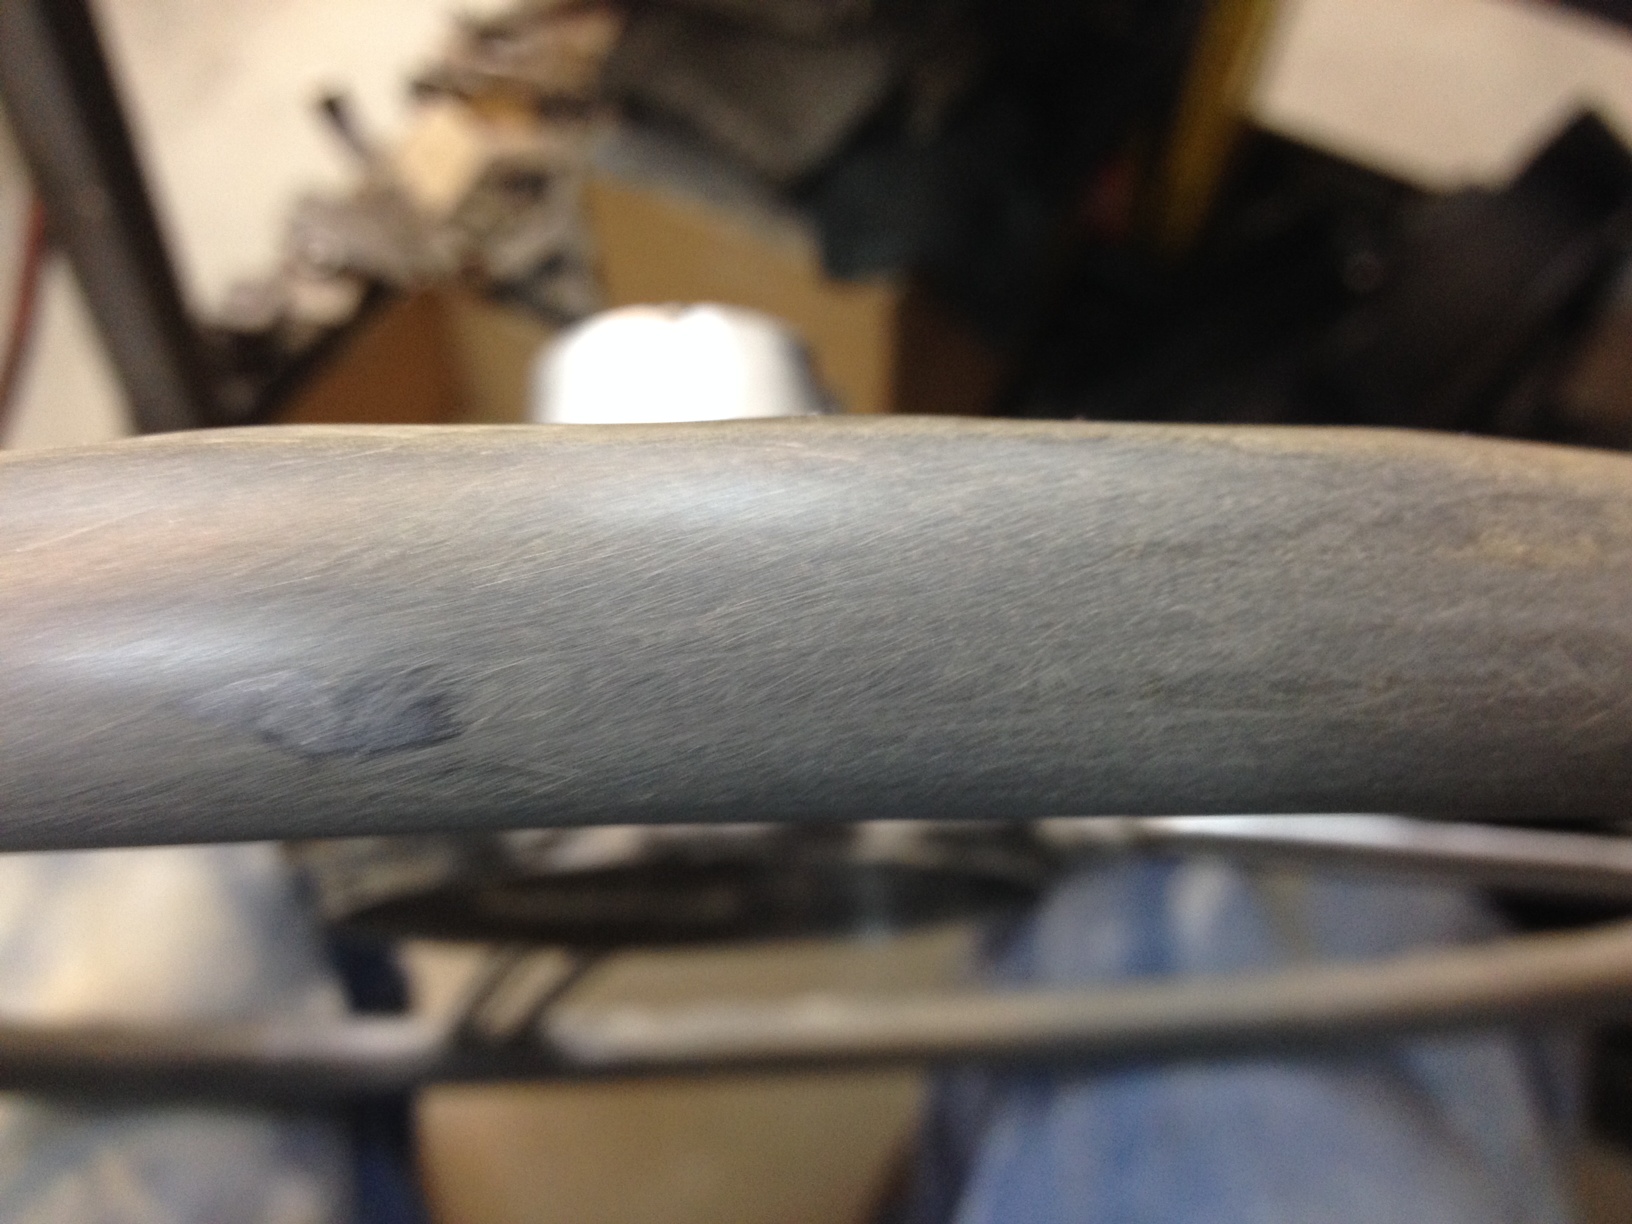
You should end up with something like the photo above. Just work the 320 gently over the scratches a couple of times and most will go right away. Next so the same thing with 400 grit paper.
Now on to the alloy hub. Use the 320 grit again and work your way around the hub, this will take some time and a lot of elbow grease……keep in mind that once that hub is painted gloss black every little mark or scratch will be amplified. Move to 400 grit paper to finish it off before primer.

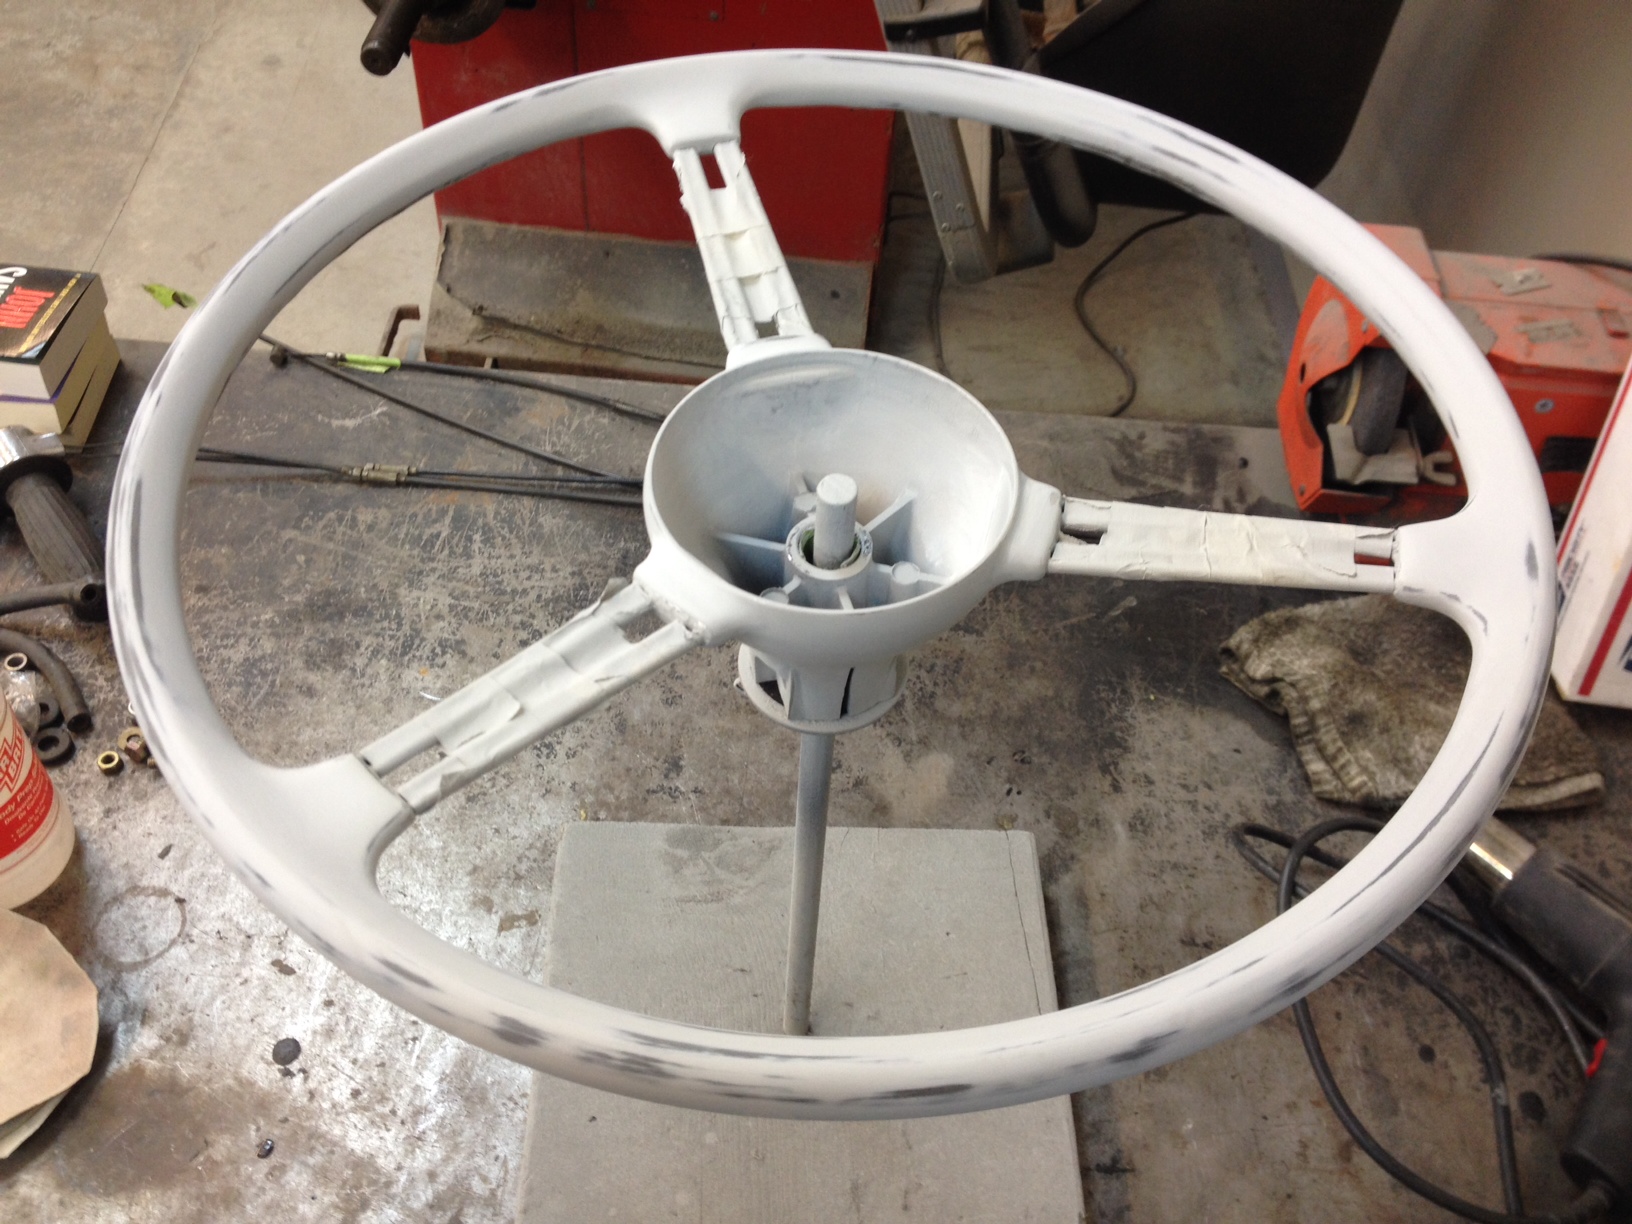
Tape off the banjo spokes. Leave a bit of space where the spokes meet the hub and outer wheel so the paint can blow in there.

This is the primer to start with. Spray on just a dusting and let it flash, about ten minutes. Follow up with a full coverage coat of primer. Guess what…….time for the wheel to sit overnight yet again. The next step will be to sand the High Build primer down with 320 or 400 grit paper.
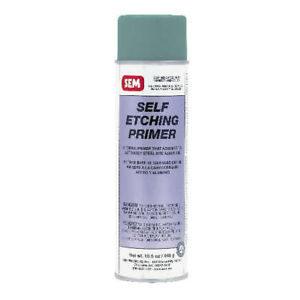
SEM paint products are available at your local professional auto paint supply store. The stuff is expensive (about $20 per can), but it’s the best, and will be compatible with what most professional body shops use for top coats. And always use a real breather when using this product!
Day Five

Primed with the SEM High Build. Sand this down with 320 or 400 paper. The High Build will fill fine scratches left over from sanding / prepping the wheel.

You’ll end up with something like the last two photos above. Now that you’ve created low spots and exposed some bare aluminum on the hub it’s time for a coating of SEM Self Etching primer.
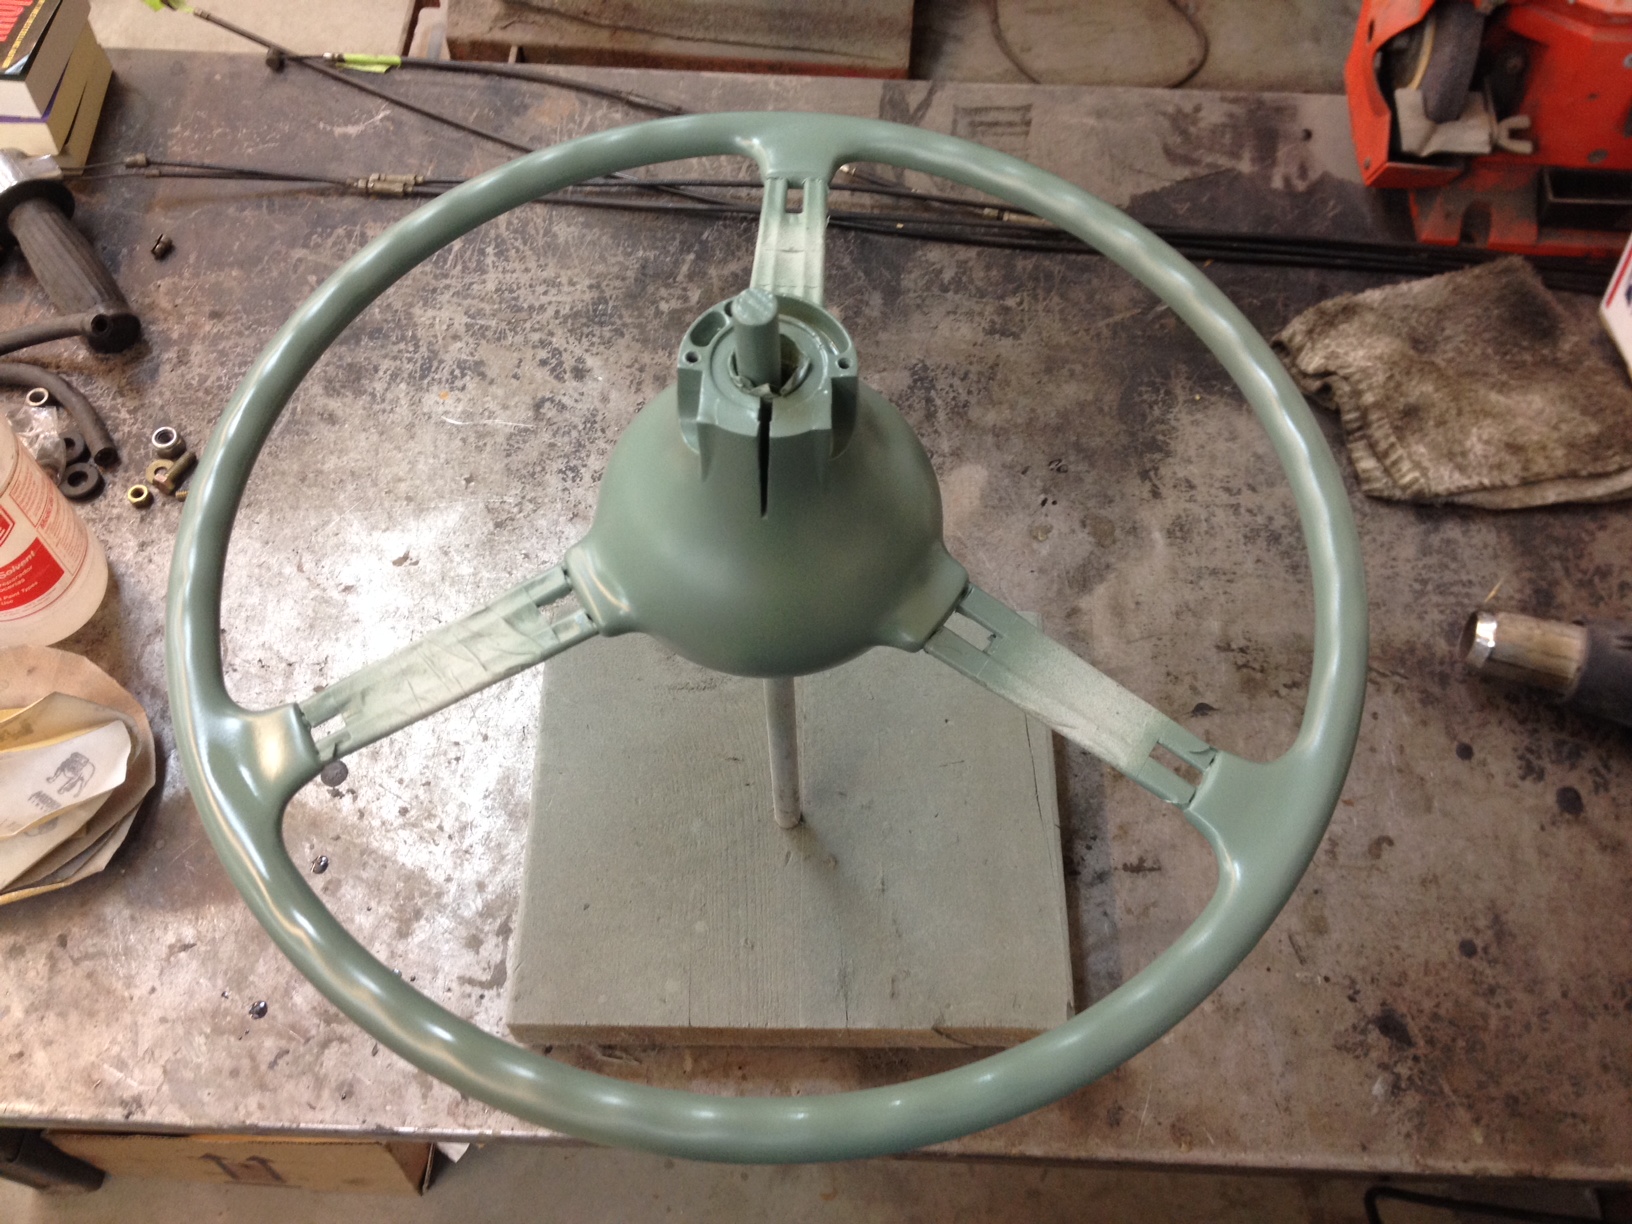
The wheel coated with Self Etching primer. The final step before paint will be scuffing the Self Etching primer with a medium Scotchbrite pad. This will be your last chance to spot any flaws in your work. Scuff the wheel down and wipe with your cleaner, use a work light to take a good look all around the wheel, if you’re happy, ship it off to the paint shop.


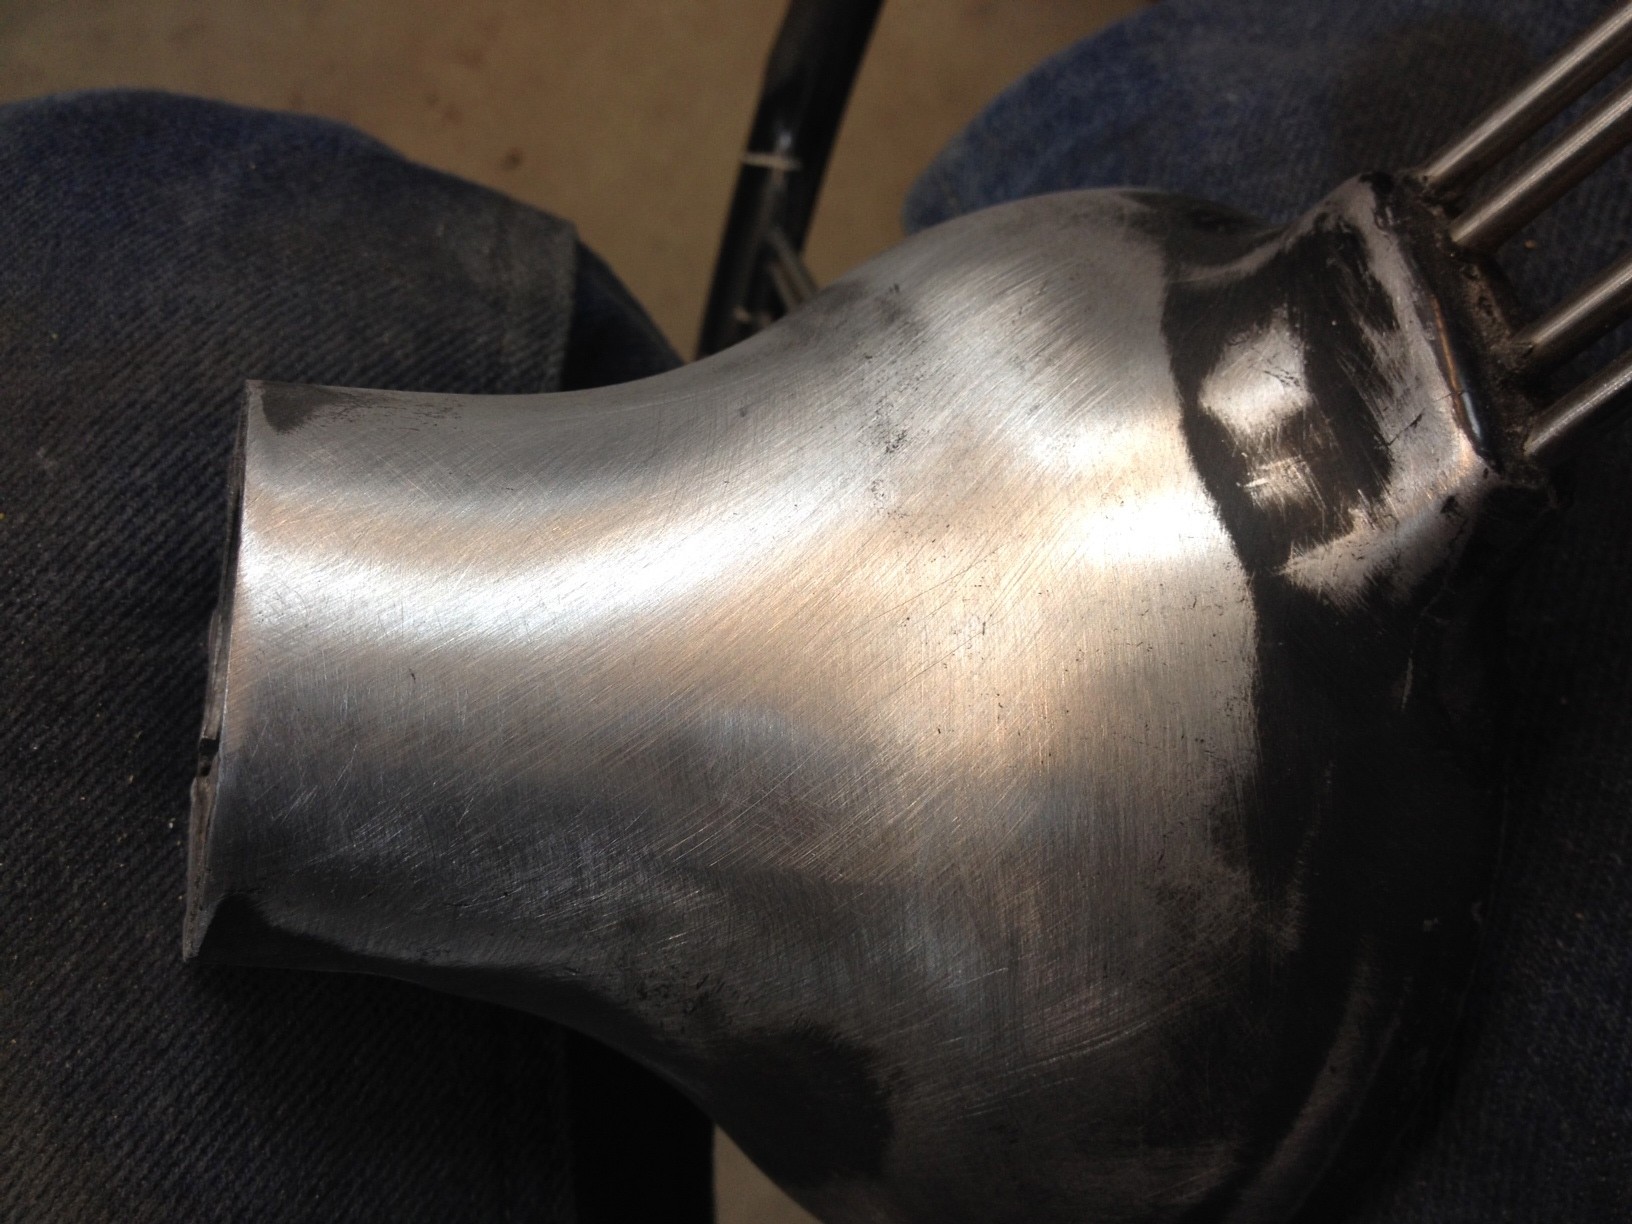
Back from paint and on it’s way to Lanny!
Thank you for showing how to restore a Banjo Wheel. I will work this majic on a 57 wheel I have.
You’re very welcome………..it’s tedious work, but you’ll be very happy with the result.
What a great tutorial… Thanks!
thanks i started mine today , lots of sanding for sure , i used plastic devcon for the filler because i had some , its hard to sand but its coming , what do you paint it with ? is it semi gloss or gloss ? thanks again
Lots of work there for sure…….I average about ten hours per wheel not including paint booth time. I use BMW Jet Black (PPG) and Nason clear coat. It’s a very deep black, what many would call “piano black”……..so to answer your question, gloss, a very high gloss. The originals, at least the ones Rovers North had in stock years ago at $700 a pop, weren’t as shiny, but that may have been age taking it’s toll. Everyone seems to really like the ultra glossy black wheels so that’s what I produce. Have fun with it!
Thanks very much for posting this tutorial!
I have a 1961 Series 2, 109 that has a banjo steering wheel in need of some help. It has two broken spokes on it that I’m not sure how to replace or install once I’ve found replacements. Any ideas?
Thanks
Hi Kevin,
You’ll need a length of 3/16″ diameter stainless steel to replace the spokes with (McMaster Carr or your local metal supplier). I’ve never had to replace spokes on any of the wheels that I’ve restored, but it’s safe to assume that they are close to a press fit into the aluminum hub and bonded there with some sort of adhesive. I would get whatever is left of the broken spokes out of the aluminum hub (maybe some mild heat will help), hopefully doing little to no damage to the hole in hub itself. Bond the new spoke into the aluminum hub (SEM Weld-Bond or your favorite metal bonding product) ………on the bakelite end I would auger out a trough for the spoke to lay in, then rebuild the area with the PC7 epoxy. You’ll have a lot of shaping to do on the bakelite side, but it’s definitely doable.
Good luck with it and please send a photo of the finished product.
Colby
I just brought a wheel like this to day. What it from? Any info would be helpful. Thanks Randy
Hi Randy,
The wheels that I restore are from old Series Land Rovers, but many other manufacturers used “banjo” stye wheels in their cars & trucks……not sure I can help identify where/what yours came from. Feel free to forward a photo.
Thanks,
Colby
Colby – this was a most helpful and well done presentation! Thanks for taking the time to do this and for sharing your experience. I will file this link for reference when I get to the interior part of my Rover resto work.
Thanks VM – Jim
Thanks for the feedback Jim…………glad it will be of some help.
Good luck with the restoration,
Colby
Hi Colby, again thanks i will use this as my tutorial. One question the final process paint. is this an option you can do yourself? where did you send it and what paint was used?
not a painter myself so no experience but wondered why you sent off as you did such a great job to that point?
Thanks
Jonathan.
Hi Jonathan,
I have a professional body shop do the final paint for me. They use a sealer, then PPG BMW Jet Black with a Nason clear coat. You can certainly paint a wheel yourself with any of the off the shelf rattle can products, and I think lots of folks do that, I just like the multi-layer process that a professional paint shop provides and in turn, the longevity that that process will provide.
Good luck with it!
Thank you for the step by step on the wheel restoration. I am about to start on mine but noticed the bakelite is a bit soft. Will the restoration still work?
Tough call without actually seeing the wheel first hand? Was the bakelite exposed to any chemicals? I’ve never had one go soft in areas…….that said, normal bakelite can be scratched/gouged with just an aggressive fingernail, so that may be what your seeing?
thanks so much, i’m semi restoring a 62 series 2a for a first car and my steering wheel is a bit rough
Great tutorial… Pulling my ’68 Sprite back into a parking spot, grabbed the wheel without thinking…. “SNAP” :0) Broke 2 spokes loose out of the rim.. : `( ` ` ` ` Bought a beautiful newly restored wheel off a FaceBook MG group member….
NOW.. I’m going to get Epoxy, The SEM products, and Paint.. and restore my Original…
I buy, restore and sell old Seth Thomas Catalin Clocks.. I remove the UV oxidation layer to bring them back to their original colors, so this type of sanding ritual I’m familiar with all too well….
Hmmm … Maybe I’ll start buying and restoring wheels now too !