

A Series IIA bulkhead in “not so bad” shape. The upper areas of this one are quite nice so will be left alone.

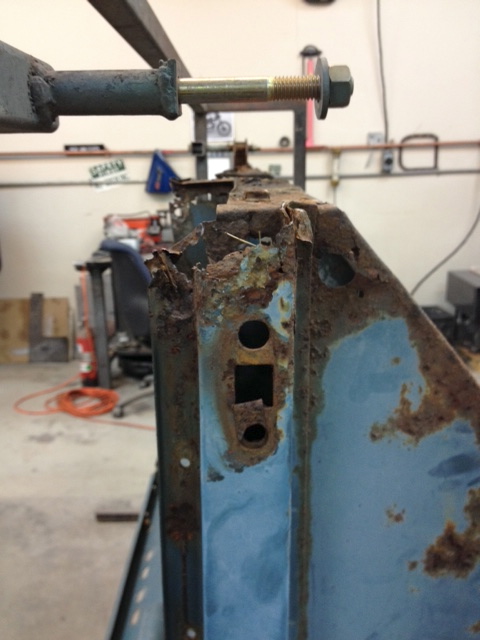
The footwells however have seen better days, as have the left side door post and center tunnel.

Center tunnel rust on both sides will be repaired with fabricated patch panels…….this will mean the original half inch flange will be maintained for a nice authentic look.
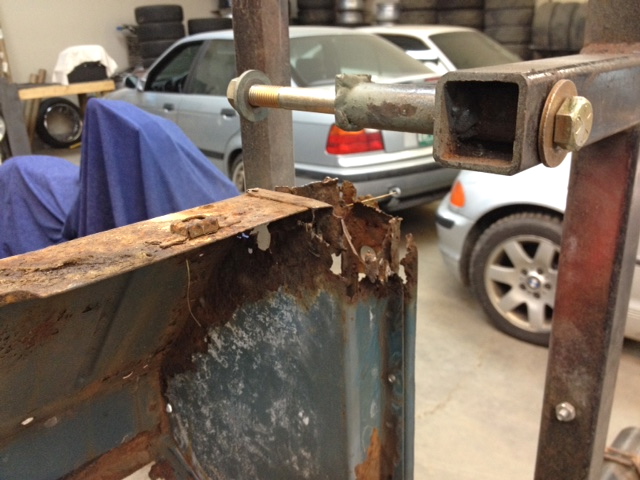
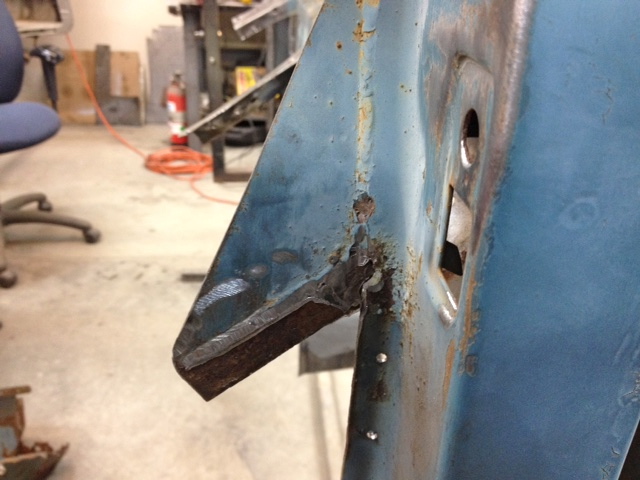
Hmmm……..something’s missing………
Yup……new lower door post for this side, not just rusted, but gone!
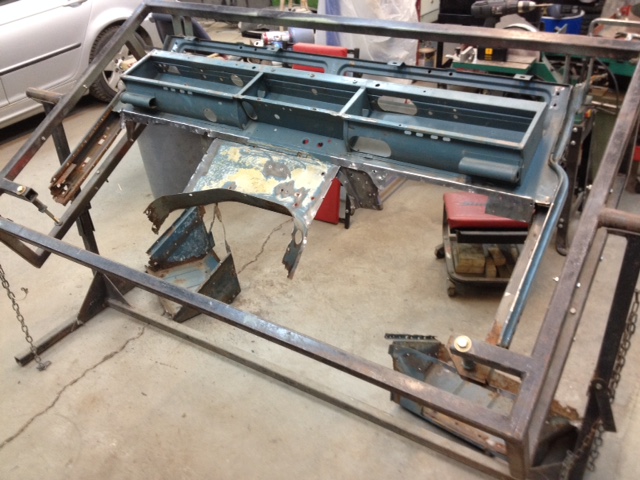
Here’s the point you want to get to for this type of repair, footwells out. Lots of spot weld drilling, some strategic weld grinding, careful cut-off wheel work, and patience.

This weld needs to be ground down and split. Be careful not to grind away the triangular flange, you need to duplicate this weld when the new footwells are in. These two corners are the most difficult parts of getting the old footwells out. If you’re trying to preserve door posts and triangular supports be very careful with your grinding and cutting…….lots of patience required here.

The weld ground down and split. I grind these welds with a little 2″ grinder and when it’s thin enough I use an air chisel with a spot weld cutter and a regulator to control the speed to split the weld. A nice sharp chisel and light hammer will do the same thing.

Top corners of the center tunnel have small welds that need to be ground down.

Upper outer kick panels, two more small welds that need to be ground away.

The photo above and the following two show panels that you will want to preserve. To break these spot welds I use just a 3/16″ drill bit and a sharpened chisel. Be gentle with the chisel and hammer, I’ve never seen these panels duplicated and for sale………and it would be a bitch to make.
As noted above, these outer supports need to be saved also.

The interior upper flange, same deal. Be careful with the chisel………preservation is the plan.

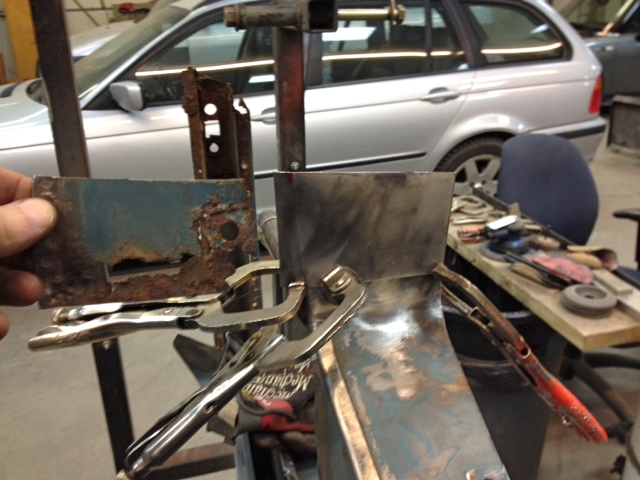
Patch panels, lower door post, tig welded in.
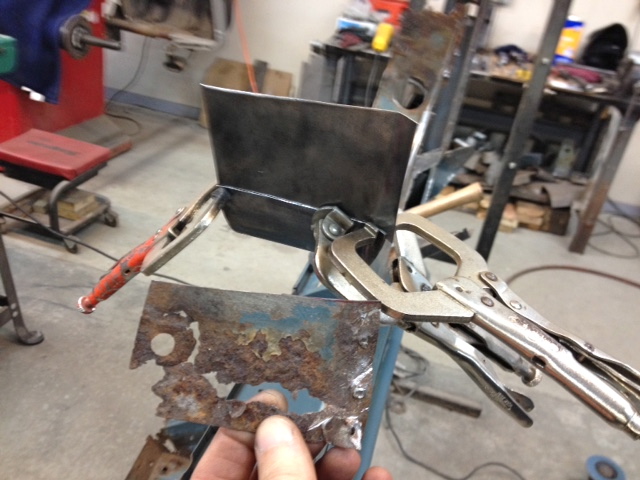
Center tunnel patch panel, will be lap welded.
Interior view.
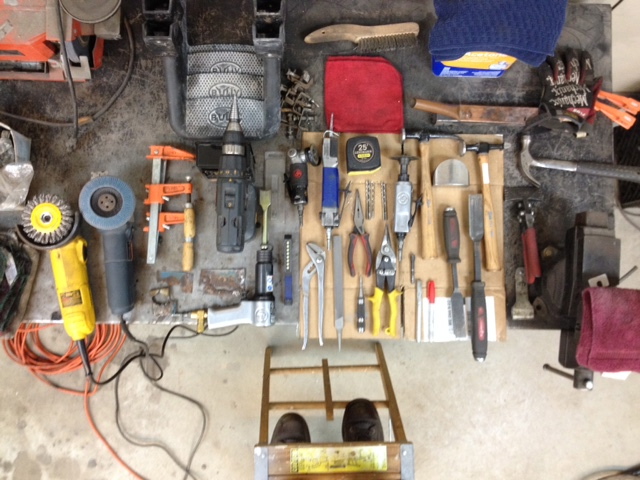
Tools used so far.

The number one…….sharpened chisel with just a bit of a curve ground in.

A speedy chisel. If you decide to use one of these make sure you have a regulator attached so you can dial back the pressure……you can do a ton of damage real quick with one of these.
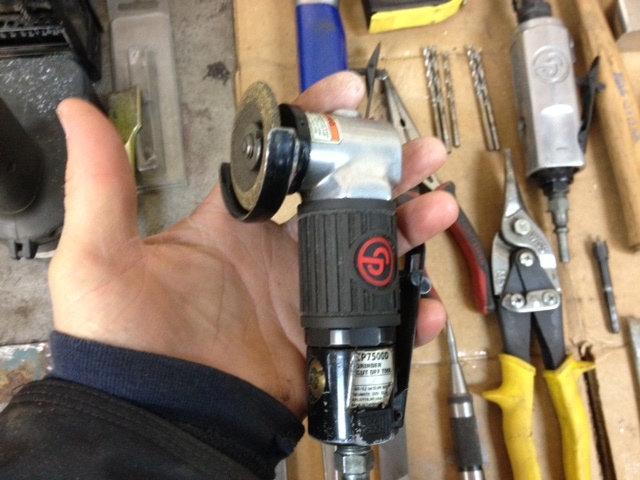
Mini grinder, kind of useless for anything but bulkhead work, but for getting into tight corners to grind small welds and avoid damaging surrounding material it’s great.
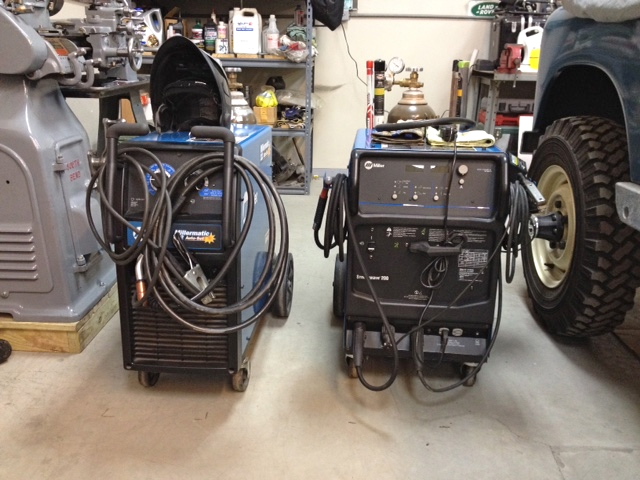
Real handy to have these two. The tig welder is great for welding old thin metal nice and neatly, but not necessary…….you can certainly get away with a nice mig welder.

Fresh from Rovers North, freshly galvanized footwells.
It takes a bit of banging around, elbow grease, and some choice words, but they fit in there…………..have lots of clamps handy.

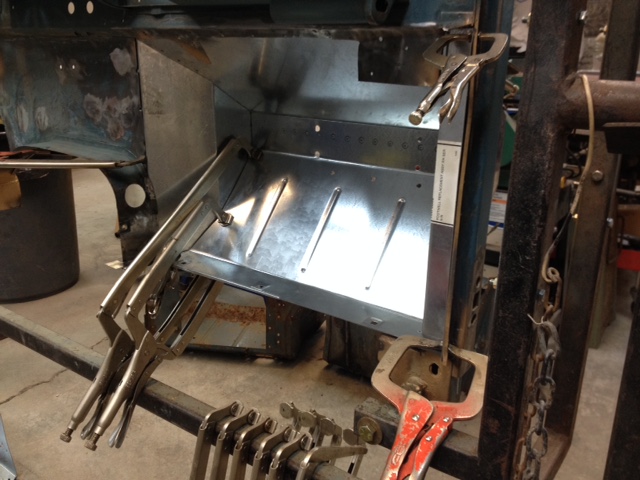
Engine side, all fits together nicely. You can see where I’ve drilled the inner kick panels for the eventual rosette/plug welds. I don’t weld anything until I’m happy with the fitment of all parts.
Door post cut to fit and tacked in.

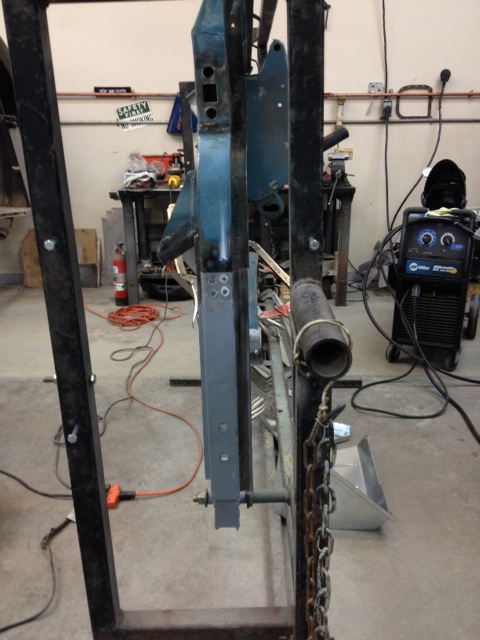
I use this “jig within a jig” to line up the new door post…….it places the new post in the same position as the removed rusted part.

Pretty much all clamped together.
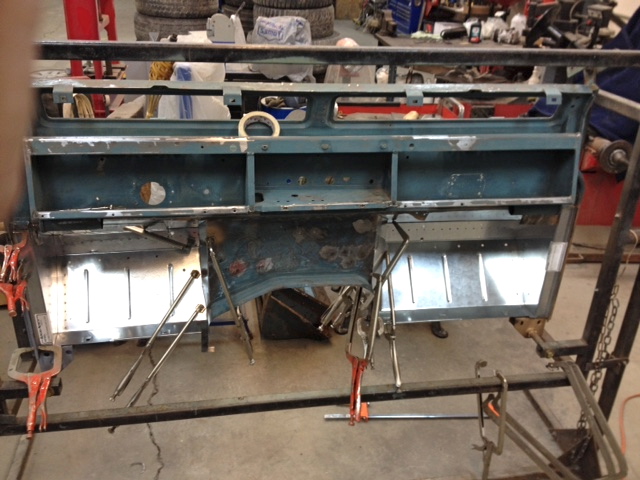
Now’s a good time to walk around the bulkhead a couple of times, take some measurements, turn it upside down, etc. Once you start welding it will suck to get half way in and discover you forgot to drill plug weld holes in a flange, panels don’t meat up correctly, or something isn’t square/straight. An ounce of prevention……….

Welded.

Now some seam sealer, final sanding and touch-ups, then it’s off to Autobahn Body Works for a coat of high build primer.